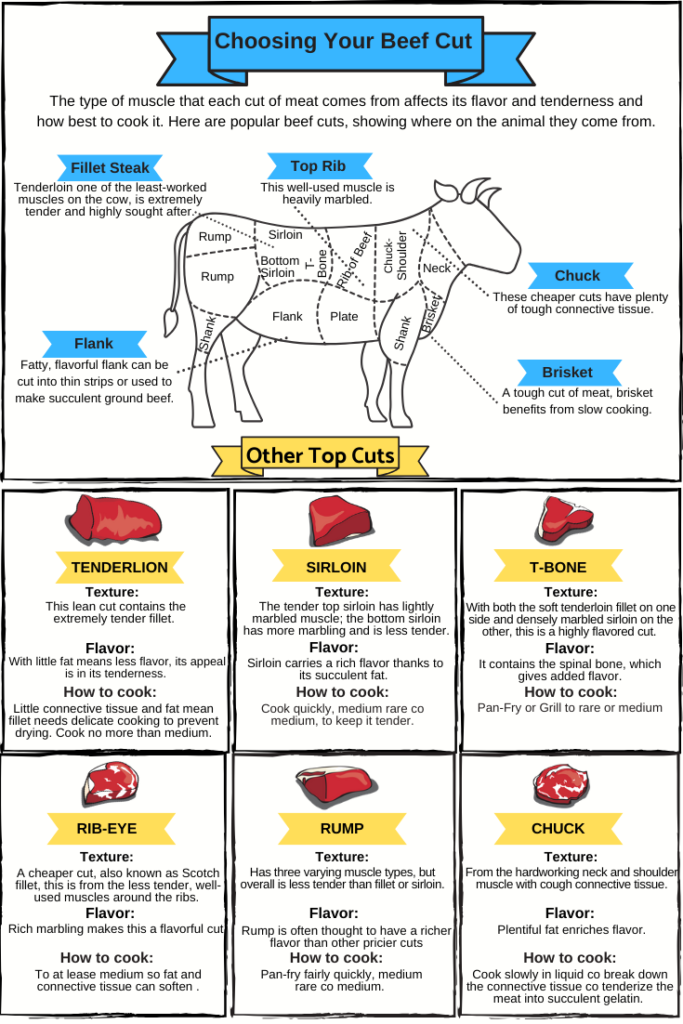
Beef can be found in various cuts with unique characteristics and the best cooking methods. Some popular cuts of beef include tenderloin, ribeye, sirloin, and chuck roast. Tenderloin is a very tender cut of beef often used for steak, while ribeye is known for its marbling and rich flavor. (Also see The Art of Selecting Fresh Chicken: A Gourmet’s Handbook to Poultry Shopping)
Sirloin is a leaner cut often used for roasts or stir-fry dishes, while chuck roast is a tough but flavorful cut often used for slow-cooking methods. By understanding the different cuts of beef, you can choose the right one for your recipe and cooking method and create delicious and satisfying meals. (Also See Gordon Ramsay Beef Guide Buying, Preparing Roasts and Steak)
In this guide, I’ll go over some basic home butchering techniques you’ll need to know to prepare your meats for a great home-cooked meal. You’ll learn how to tie perfectly and butterfly primal cut meats into roasts, as well as learn how to trim off the fat and cut meat into cubes to use in stews.
Finally, you’ll understand how to clean a whole tenderloin in your kitchen purchased from the local supermarket, ensuring you’re using the best quality, freshest meat possible. You’ll be able to do all this without the help of a butcher.
Best Beef Cut for Slow Roasting and Seasoning Meat for Cooking
When it comes to slow-roasting beef, the best meat cut is tough and requires a longer cooking time to become tender and flavorful. Some popular cuts of beef that are well-suited for slow roasting include chuck roast, brisket, and round roast.
By choosing the right cut of beef for slow roasting, you can create delicious and satisfying meals that are tender and flavorful. Chuck roast is a flavorful cut with good marbling that becomes tender and juicy when slow-cooked, while the brisket is a tougher cut that requires a longer cooking time but yields delicious and moist results. Round roast is a leaner cut of beef that also benefits from slow roasting, as it becomes tender and juicy when cooked slowly at a low temperature.
One of the things I’ve learned along the way with meat as I taught myself how to cook was that purchasing good quality USDA-inspected wholesome meat is the first and most important step of cooking a delicious meal. After several steps between purchasing your meat, you must know before cooking, which can harm your finished recipes.
The best cuts of beef for slow roasting are tough and require a longer cooking time to become tender and flavorful. Some popular cuts of beef that are well-suited for slow roasting include:
- Chuck roast: a flavorful cut with good marbling that becomes tender and juicy when slow-cooked.
- Brisket: a tougher cut that requires a longer cooking time but yields delicious and moist results.
- Round roast: a leaner cut of beef that benefits from slow roasting, as it becomes tender and juicy when cooked slowly at a low temperature.
- Short ribs: a flavorful cut of beef with plenty of fat that becomes fall-off-the-bone tender when slow-cooked.
By choosing one of these cuts of beef for slow roasting, you can create delicious and satisfying meals that are tender, juicy, and full of flavor.
Best Meat to Slow Cook in Oven
The best types of meat to slow cook in the oven are cuts with a lot of connective tissue and fat, which will break down and become tender during the long, slow cooking process. These cuts are also typically less expensive than other cuts of meat.
Some of the best meats to slow-cook in the oven include:
- Beef chuck roast
- Pork shoulder or butt
- Lamb shanks
- Short ribs
- Brisket
These cuts of meat can be cooked in the oven for several hours at a low temperature, such as 300-325 degrees Fahrenheit, until tender and falling apart. Adding enough liquid to the pan is important to prevent the meat from drying and help it cook evenly.
Before cooking, you can season the meat with a dry rub or marinade to add flavor. Add vegetables such as onions, carrots, and potatoes to the pan for a complete meal.
Overall, the best types of meat to slow cook in the oven are those with a lot of connective tissue and fat, such as beef chuck roast, pork shoulder or butt, lamb shanks, short ribs, and brisket.
Simple Butchering Techniques
Simple butchering techniques are essential for anyone who wants to prepare meat for cooking. These techniques include deboning, trimming, and portioning meat to the desired size and shape. By learning these techniques, you can save money by buying whole cuts of meat and portioning them yourself, and also create customized cuts tailored to your preferences and cooking method.
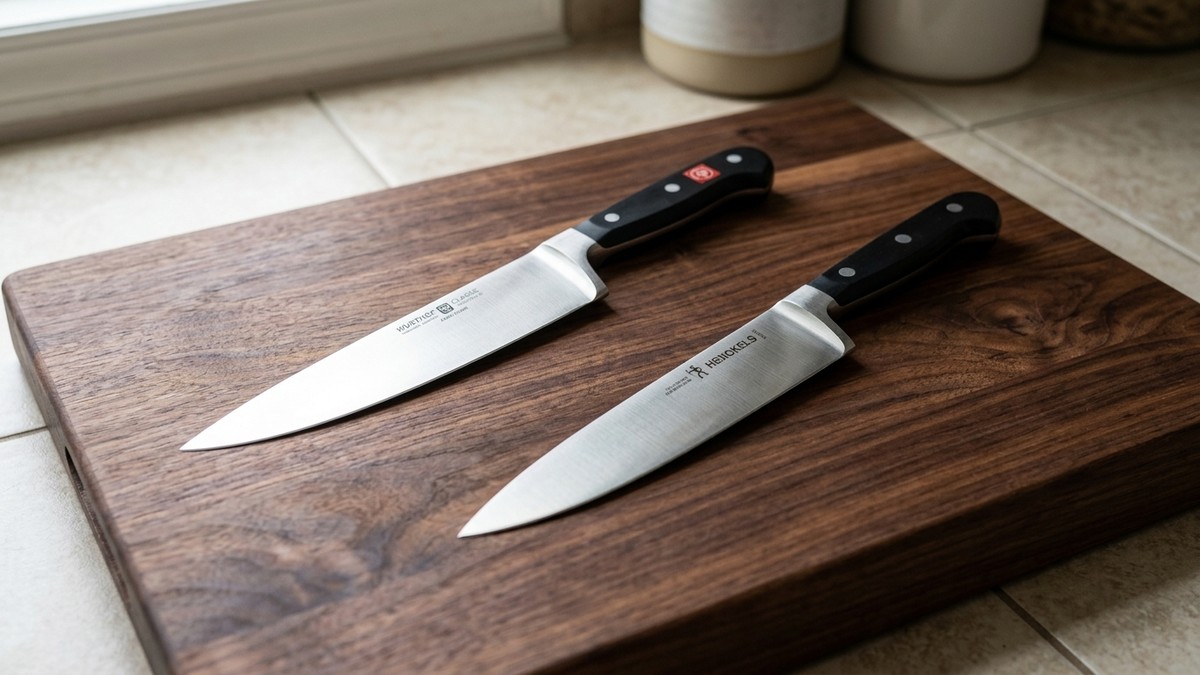
Simple butchering techniques can be done using a sharp knife or kitchen shears and require some basic knowledge of animal anatomy. You can prepare meat for various recipes and create delicious and satisfying meals by mastering these skills.
Below, I will explain the butchering Techniques for butterflying smaller and larger roasts, tying roasts, cutting stew meats, and cleaning (peeling) a beef tenderloin.
How to Butterfly Smaller Roasts
Butterflying smaller roasts flatten the meat and create a more uniform thickness for even cooking. This technique involves cutting the meat horizontally almost all the way through and then opening it up like a book so it lays flat. By doing this, the roast will cook more evenly and in less time, which can help to prevent dryness and improve the flavor.
This technique is often used for smaller cuts of meat, such as pork loin or beef sirloin, and is a simple but effective way to create a delicious and satisfying meal.
- Begin by holding your chef’s knife parallel to your cutting board, keeping your other hand on top of the tenderloin to steady the meat. Make your first cut halfway up the roast’s side.
- With gentle, saw-like motions, keep cutting through to the other side of the tenderloin, but stop about one-half-inch away from the meat’s edge to keep the halves attached.
- Open the roast flat onto your cutting board with your hands, then use your chosen recipe’s directions as suggested.
How to Butterfly Larger Roasts
Butterflying larger roasts is a technique used to create a more uniform thickness in the meat, which can help it to cook more evenly and in less time. This technique involves making a horizontal cut through the meat, about two-thirds of the way up from the bottom and then opening it up like a book. The roast is then pounded to an even thickness and rolled up, creating a more compact shape for more uniform cooking.
This technique is often used for larger cuts of meat, such as beef or pork roasts, and can be a simple but effective way to create a delicious and impressive meal.
- Just as you did with the pork loin, keep your knife parallel to your cutting board and use the other to steady the tenderloin. Make the first cut about one-half-inch from the meat’s bottom.
- With gentle, saw-like motions, keep cutting through the meat, but stop about one-half-inch from the meat’s edge. You can peel the meat back as you always work to see where your knife is going if you need to.
- Open up your meat and cut through it again. Stop about one-half-inch from the meat’s edge. You might need to make more cuts depending on how large your tenderloin cut roast it.
Do this until you reach the roast’s end, then open it up flat onto the cutting board and use your chosen recipe directions as suggested.
Tying a Roasts with Twine
Tying a roast with twine is a technique used to create a more compact shape in the meat, which can help it to cook more evenly and in less time. This technique involves wrapping kitchen twine around the roast and tying it regularly to create a more uniform shape. By doing this, the roast will cook more evenly and hold its shape better, making it easier to carve and more visually appealing.
Tying a roast with twine can be used for a variety of cuts of meat, including beef, pork, and lamb, and is a simple but effective way to create a delicious and impressive meal, help your meat cook evenly and maintain its shape while roasting; my favorite is cotton. Here are the steps to tie a roast with twine;
How to Tie a Roast with a Surgeon’s Knot
Tying a roast with a surgeon’s knot creates a more secure and tight knot than tying a roast with twine. This knot is similar to a regular knot but involves an extra loop that helps to hold the twine more securely.
This technique is often used for larger cuts of meat, such as beef or pork roasts, and can be a simple but effective way to create a more compact shape for more uniform cooking. By tying the roast with a surgeon’s knot, the meat will hold its shape better and cook more evenly, resulting in a more delicious and impressive meal.
- Take a long piece of your kitchen twine and run it under your tenderloin widthwise. Stop around an inch’s distance from the farthest end. Make one loop as if you’re starting to tie your sneakers.
- Then, run the end of your piece of twine underneath the single loop again. Pull it down forcefully. Your second loop will help the twine remain in place tightly.
- While holding the first loop where it should stay, make another knot with the twine, then pull it taut against your tenderloin roast. Use some scissors to cut the twine ends, but leave a tail about a half-inch long.
Repeat this process, creating spaces with the loops of twine about an inch apart until you get to the roast’s end.
How to Tie Roast with a Butcher’s Knot
Tying a roast with a butcher’s knot creates a more secure and tight knot than tying a roast with twine. This knot involves making a loop around the roast and then wrapping the twine around the loop to create a more secure knot. By tying the roast with a butcher’s knot, the meat will hold its shape better and cook more evenly, resulting in a more delicious and impressive meal.
This technique is often used for larger cuts of meat, such as beef or pork roasts, and is a simple but effective way to create a more compact shape for more uniform cooking. It’s a little more difficult, but it’s an adjustable slipknot that requires less twine than the previous method.
- Run the twine length under the roast widthwise, stopping about an inch from the farthest end. If you’re right-handed, keep the twine ball on your left side, which will be called the standing side (and vice versa).
- Now pass the twine’s right end under the standing side and through the little loop. Pull the right end of the twine to make a knot. Pull and adjust the twine until the knot rests snuggly on the roast.
- To lock the slipknot, tie a simple knot and trim the excess. If you’re working with the whole ball of twine, twist a loop on the standing twine, pull the right end through, and pull down tight.
How to Cube Stew Meat
Cubing stew meat is a technique to cut the meat into smaller, more uniform pieces for use in stews, soups, and other dishes. This technique involves cutting the meat into small, bite-sized cubes, typically around 1-2 inches in size. To cube stew meat, trim any excess fat and gristle from the meat and cut it into slices roughly the same thickness.
The slices are then cut into strips, and the strips are cut crosswise to create the cubes. Cubing stew meat can be done with a sharp knife and a cutting board and is a simple but essential technique for creating delicious and satisfying meals. The best cut for stew meat comes from the shoulder of the animal.
- Separate your roast into smaller pieces of meat by pulling the tenderloin apart along the fat lines that run through the larger piece. A long fat line will separate the roast’s muscles; you can pull the muscles apart with your hands. If using just your hands becomes too difficult, you can cut the pieces from the fat lines with a chef’s knife.
- With your boning knife, remove the hard pieces of fat and the silver skin. These parts of the tenderloin cannot break down when they’re cooked. The softer fat can remain on the meat because it will melt when it is stewed and become a delicious, rich sauce for your roast.
- Cut the roast into one-half to two inches thick slices with a chef’s knife.
Continuing to use your chef’s knife, cut the slices into cube shapes. These cubes do not need to be perfectly symmetrical since your roast is not one perfect shape, but it helps keep the size as consistent as possible to ensure even cooking across the pieces.
How to Trim Whole Beef Tenderloin for Roasting
Trimming a whole beef tenderloin for roasting is an essential step in preparing this popular cut of meat. Remove excess fat, silver skin, and connective tissue from the meat to trim a beef tenderloin. The tenderloin can be cut into portions, such as filet mignon, or left whole for roasting.
When roasting a whole tenderloin, it’s important to tie it with kitchen twine to ensure even cooking and a more uniform shape. You can create a delicious and impressive meal to impress your guests by trimming a whole beef tenderloin for roasting.
- Locate the hard fat and sinuous muscle line, called the “chain.” Under one end of the “chain,” insert the blade of your boning knife and cut through the meat to the closest end. With that little flap, pull the “chain” away. If need be, you can use your knife for assistance as you pull the meat.
- Place the tip of your boning or paring knife barely under the fat line to create another small flap, then tug on this flap to easily remove the surface fat on your roast. This will also allow you to remove fat without removing any of your meat. If it is too difficult to pull the fat away, use a knife to cut it without carefully removing the meat.
- Just under the silver skin’s surface, work your knife’s tip and hold the meat flap while using it to remove the patchy pieces of silver skin. If you leave this silver skin on the roast, it tightens as it cooks and pulls your roast into a curled shape.
- Remove the chateaubriand with your chef’s knife, located in the tenderloin center, weighing around two to two and one-half pounds. Use a ruler to ensure your roast will fit well in your skillet for browning it if desired.
Take a chef’s knife and use it to cut through both ends of the roast. These steps will leave you with three separate roasts: the tail, the chateaubriand, and the butt tender.
How to Clean Silver Skin off Meats for Roasts
Cleaning silver skin off meats for roasts is an important step in preparing meat for cooking. Silver skin is a thin layer of tough connective tissue that can make the meat chewy and difficult to eat. To clean silver skin off meats, use a sharp knife to carefully remove the tissue from the meat, not removing too much of the meat itself.
This can be time-consuming but essential for creating tender and delicious roasts. Cleaning silver skin off meats for roasts ensures that your meat is of the highest quality and will be tender, flavorful, and satisfying.
- Just under the silver skin on a piece of meat, insert the tip of your paring or boning knife. Cut through enough to make a slit that is one inch wide. At the same time, hold your knife almost parallel to your cutting board, with its blade facing away from your hand holding the roast.
- Put the knife tip underneath a piece of silver skin. Cut through enough to make a slit about one inch wide.
- Using gentle, saw-like motions, cut barely under the sliver skin’s surface. Point the knife away from your hand, holding the meat until you reach the silver skin’s end. You will have created a flap.
- Pull up on the small flap with your hands or paper towels and turn the knife so the blade’s edge faces the opposite direction. Keep cutting through until the other side, and repeat until all the silver skin is gone.
How to Freeze and Thaw Meats
Freezing and thawing meats is an important part of storing and preparing meat for cooking. To freeze meats, wrap them tightly in plastic or freezer paper and place them in a freezer-safe container or bag. Make sure to label the package with the type of meat and the date it was frozen. Meats can be stored in the freezer for several months.
To thaw frozen meats, several methods can be used. The safest method is to slowly thaw the meat in the refrigerator, allowing it to thaw at a safe temperature. This method can take several hours or overnight, depending on the size of the meat. Another method is to thaw the meat in cold water, place it in a sealed plastic bag and submerge it in cold water.
This method can be quicker, but it requires more attention to ensure that the water remains cold and the meat does not start to cook. A third method is using a microwave to thaw the meat, which can result in uneven thawing and can partially cook the meat in some areas.
Properly freezing and thawing meats ensures your meat is safe, high-quality, and ready to cook whenever needed. When thawing meats, it’s important to handle them carefully to prevent the growth of harmful bacteria. Thawed meats should be cooked immediately and not refrozen.
The U.S. Department of Agriculture states that frozen food that has been refrigerator-thawed can safely be refrozen if raw. But this is not recommended because it only furthers the moisture-loss issue.
How to Rinse Meats
Rinsing meats is a controversial topic, as there are differing opinions on whether or not it is necessary or safe. Some experts argue that rinsing meats can spread bacteria and increase the risk of foodborne illness, while others believe that rinsing can help to remove excess blood, bone fragments, or other debris that may be present on the meat.
If you choose to rinse meats, it’s important to do so carefully and safely. Start by removing the meat from its packaging and placing it in a clean sink or bowl. Rinse the meat under cold running water, using your hands to gently rub the surface of the meat and remove any debris. Avoid using hot water, as this can cause the meat to start cooking and increase the risk of bacterial growth. After rinsing the meat, pat it dry with a clean paper towel or cloth.
By rinsing meats carefully and safely, you can help to remove any debris that may be present on the meat, but it’s important to weigh the potential risks and benefits before doing so. It’s important to note that some meats, such as chicken and turkey, should never be rinsed, as this can increase the risk of spreading harmful bacteria. Instead, these meats should be cooked thoroughly to a safe internal temperature to kill any bacteria that may be present.
Brined meats, however, need to be rinsed before cooking them, so make sure you bleach your sink and the surrounding countertops after rinsing the meat. Blot the moisture on your meat with dry, clean paper towels before cooking because excess moisture prevents the meat from browning well.
How to Season Meats
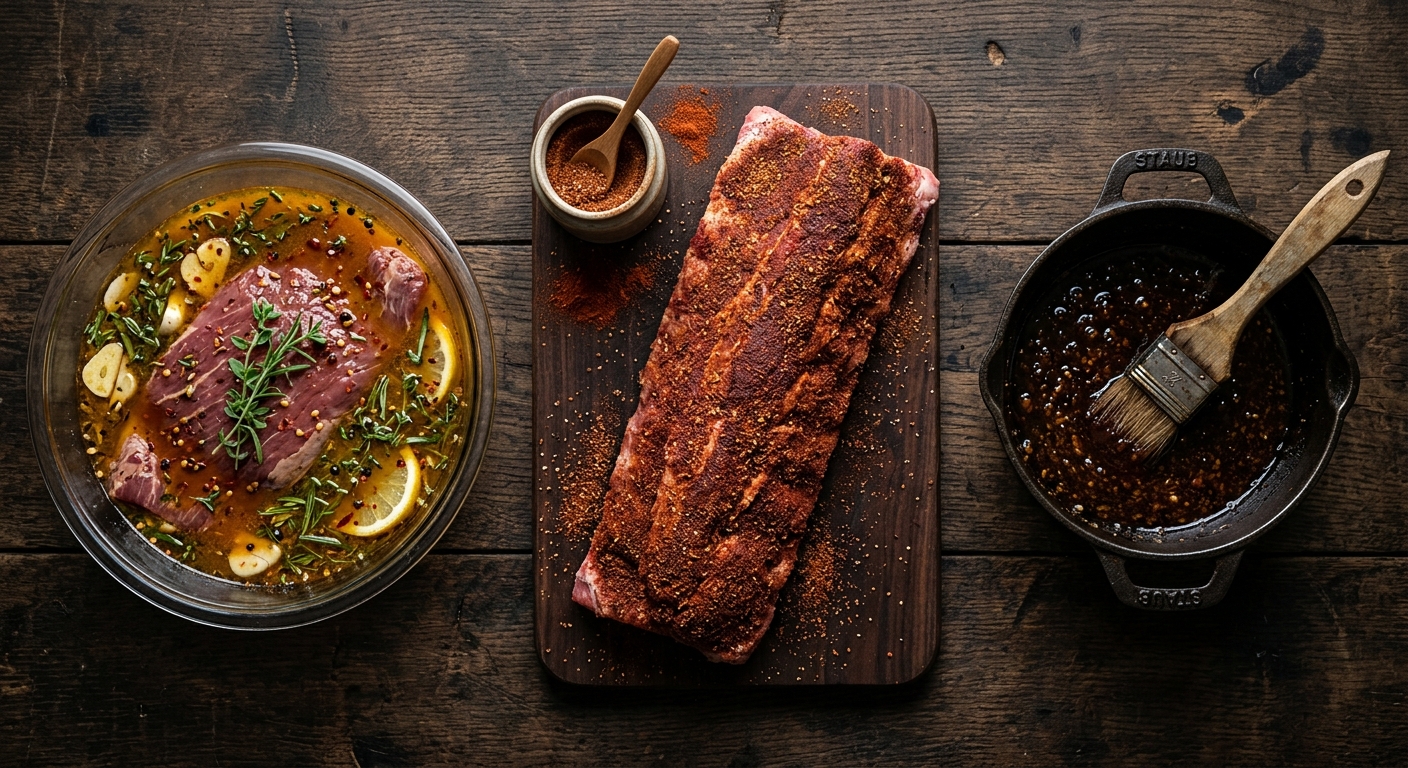
Seasoning meats is an essential step in preparing them for cooking, as it helps to enhance the flavor and create a more delicious and satisfying meal. There are many ways to season meats, including using dry rubs, marinades, or simply adding salt and pepper.
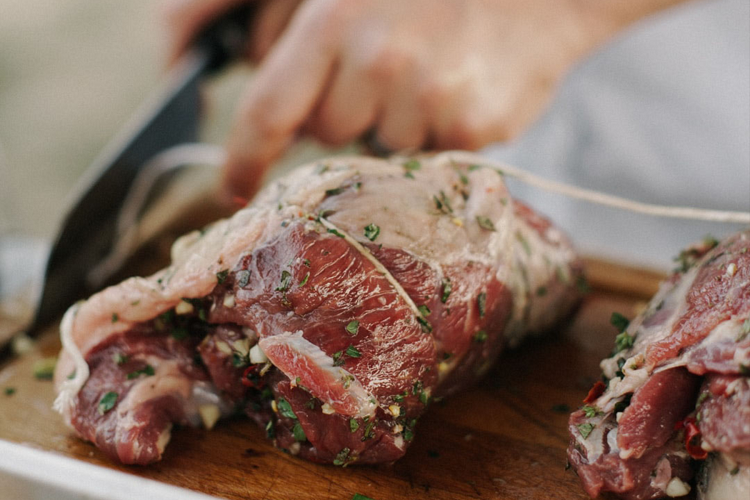
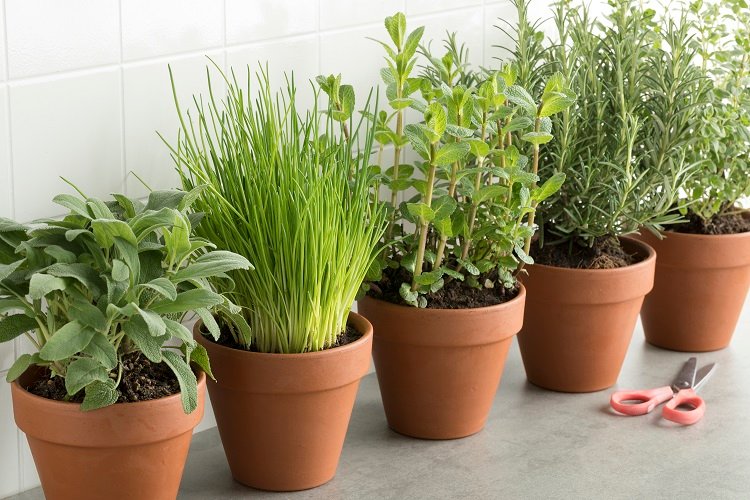
Combine herbs, spices, and other flavorings, such as garlic or onion powder, to season meats with a dry rub. Rub the mixture all over the meat, and coat it evenly. Allow the meat to sit for a few minutes or overnight to allow the flavors to penetrate the meat.
Marinades are another popular way to season meats and can be made with various ingredients, such as vinegar, citrus juice, soy sauce, or other flavorings. To marinate meats, place them in a shallow dish and cover them with the marinade, making sure to coat them well. Allow the meat to marinate for several hours or overnight, depending on the meat’s thickness and the marinade’s strength.
When seasoning meats with salt and pepper, use good quality sea salt or kosher salt and freshly ground black pepper. Season the meat generously on all sides, making sure to rub the seasoning well.
No matter how you season your meats, it’s important to let them come to room temperature before cooking, which allows the flavors to develop and the meat to cook more evenly. You can create delicious and satisfying meals that impress your guests by seasoning meats properly.
How to Salt Meats
I use two different methods to season meat, either salting or brining. Salting is far more convenient (you do not need to put a vat of salted water in your refrigerator) and does not get in the way of a nicely-browned crust on your meat. This is because no moisture is added to the exteriors of your meat. However, salting meat is a slower process than bringing it.
When salt is put onto raw meat, the meat’s juices are pulled to the meat’s surface. Later, the salt dissolves in the liquid that is exuded. This forms a brine, which the meat eventually reabsorbs.
The salt also restructures the meat’s muscle proteins, which allows them to retain more natural juices. Relatively juicy meats or well-marbled meats are optimal choices for salting.
My favorite salt for salting meat is kosher; it’s much easier to distribute it evenly. Reduce the amounts of salt by a third if you’re using Morton brand Kosher Salt. I include the kinds of meats I salt, methods, and timings for the process.
| Time | Kosher salt | Method | |
|---|---|---|---|
| Lamb Chops, Steaks, and Pork Chops | salt for one hour | use 3/4 teaspoon for every 8 ounces of meat | Apply the salt evenly over your meat and let it rest uncovered at room temperature. |
| Lamb, Pork, and Beef Roasts | salt for a min of six hours and a max of twenty-four hours | 1 teaspoon for every pound of meat | Apply the kosher salt evenly, wrap the meat tightly with plastic wrap, and let it rest in the refrigerator. |
How to Brine Meats
Brining is very similar to salting; the sodium content in brine provides seasoning for the meat and protein restructuring, reducing chewiness and keeping the meat juicy and full of flavor.
Brining works more quickly than salting and can create juicier lean cuts because it adds moisture, not simply assists in retaining moisture. It works especially well in pork cuts, such as tenderloin or center-cut pork chops.
I recommend brined pork meat because it has white, more delicate meat that better withstands cooking heat with the brining. Brining does inhibit meat browning, and it also requires fitting a container for bringing in your refrigerator.
For brine, I prefer table salt because it dissolves easily. I include the cuts of pork I brine and amounts of water needed, and timing notes. Add your meat to the container when the table salt dissolves and put it into the refrigerator. Do not brine for longer than directed, or your meat may become too salty.
Here is a table detailing how to brine meats, including weight, time, and amount of water needed:
| Type of Meat | Weight | Brine Time | Amount of Water | Amount of Salt | Amount of Sugar |
|---|---|---|---|---|---|
| Whole chicken | 4-6 lbs | 4-6 hours | 1 gallon | 1 cup | 1/2 cup |
| Pork chops | 1 inch thick | 8-12 hours | 1 quart | 1/4 cup | 1/4 cup |
| Turkey | 12-14 lbs | 8-12 hours | 2 gallons | 2 cups | 1 cup |
| Corned beef | 4-5 lbs | 5-7 days | 1 gallon | 1 cup | 1/2 cup |
To use this table, first determine the type of meat you want to brine and weigh it to ensure you have the correct measurements. Then, mix the appropriate amount of water, salt, and sugar in a large container, stirring until the salt and sugar have dissolved. Add the meat to the brine, ensuring it is fully submerged, and refrigerate for the recommended time. After the brining period, remove the meat from the brine, rinse it with cool water, and pat it dry before cooking.