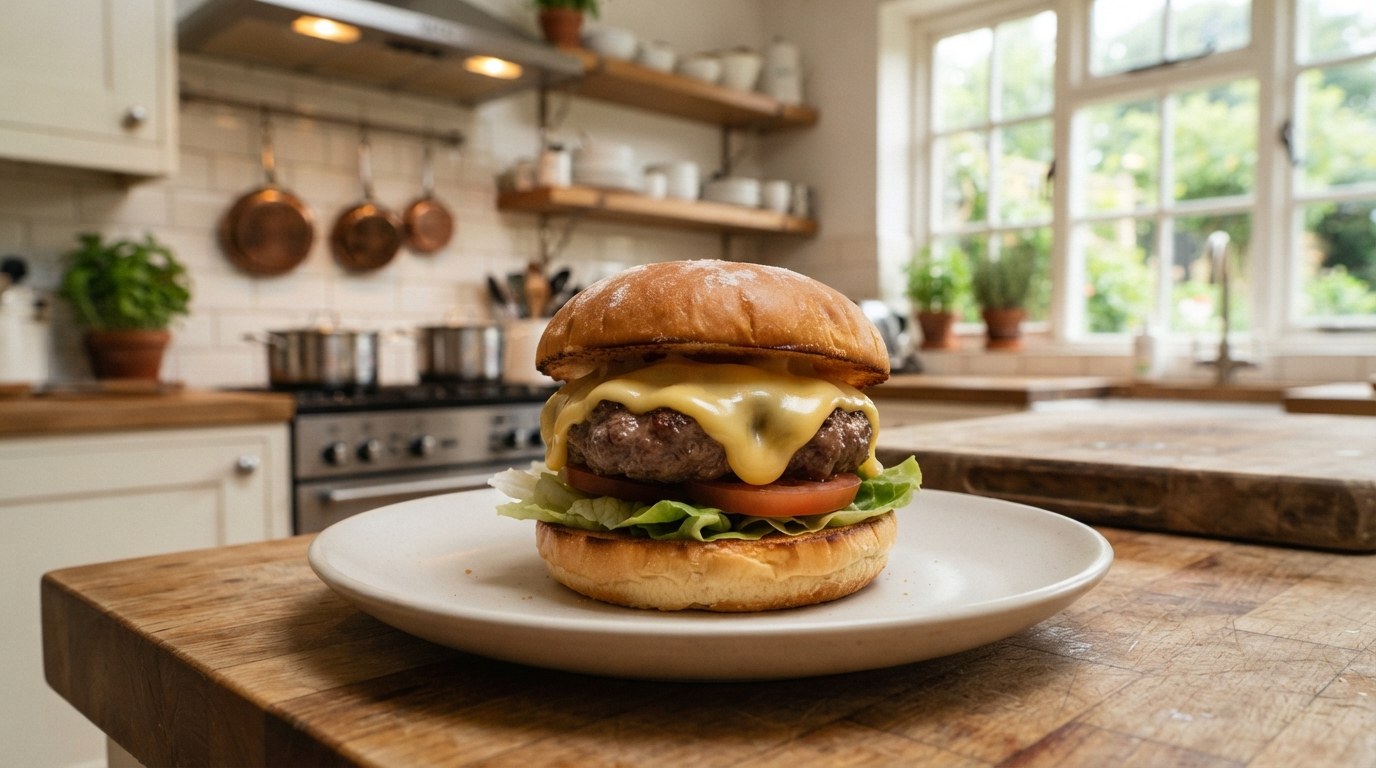
The way to get cheese that is fully melted and crisp at the edges on a burger is to melt it on the pan instead of on the patty. Gordon Ramsay lays a slice of cheese straight onto a hot nonstick pan, lets it melt into a bubbling puddle while its edges brown into a thin lace, seasons it with a pinch of salt, and then presses the toasted bottom bun down onto it to lift the whole molten sheet onto the burger. It takes about a minute, and it gives you something a slice draped over a patty never does: cheese melted all the way through, with crisp, savory, lacy edges that hang over the sides.
This works because of what cheese actually is and how it behaves on heat, and it goes wrong for two specific reasons, heat and the pan. What follows is why melting on the pan beats melting on the patty, the science of why the cheese crisps and lifts, which cheeses melt this way and which do not, and the two mistakes that turn it into a greasy, stuck mess. It sits in the site's cooking techniques guides and works on any of the burgers below.
Melt the Cheese on the Pan, Not on the Patty
Melting the cheese on the pan gives you control that draping a slice over the patty does not. The usual method leans on the patty's leftover heat to melt the cheese from below, which often leaves the top of the slice cold and rubbery by the time the burger hits the plate; the common fix, a splash of water under a cover to steam it, melts the cheese but softens the bun and waters down the sear. On the pan, the cheese melts evenly and completely because it is sitting directly on the heat, and you watch it happen and pull it exactly when it is ready. The bonus is the part you cannot get any other way: the edge of the cheese that touches the dry pan browns and crisps into a lacy, savory frill, a little like the crown of cheese on a smash burger, and the toasted bun picks the whole sheet up in one piece.
Ramsay's own kitchen philosophy is behind why this is a pan trick and not a patty trick: spend on a good nonstick pan, cook with your eyes, and season everything, even the cheese. The technique is really just those three habits pointed at a slice of cheese. You do it in the same pan you cooked the patty in, off to one side or right after, so nothing extra gets dirty.
Why the Cheese Crisps and Lifts: The Science
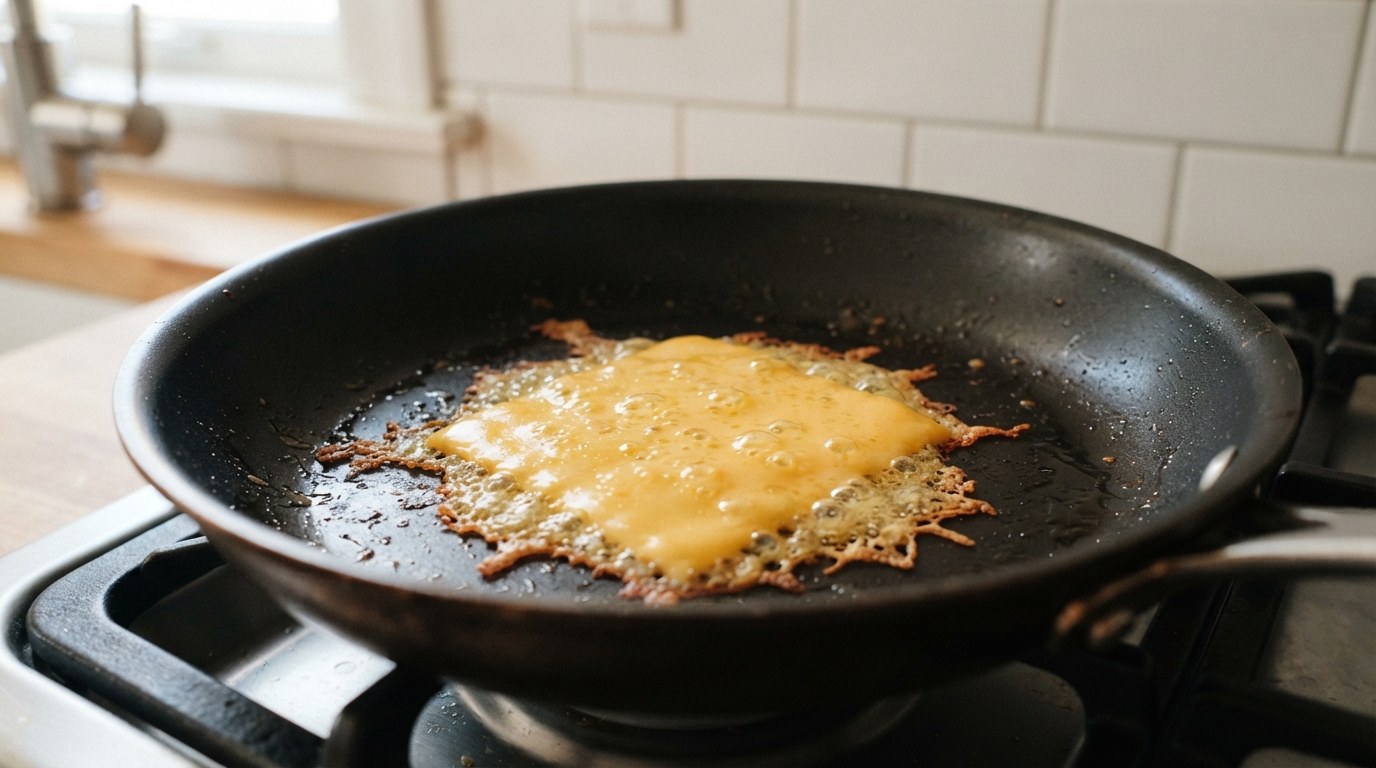
Cheese is an emulsion: droplets of milkfat held inside a web of casein protein, with water and calcium woven through it. When it heats, two things happen in order, and the Cheese Science Toolkit, a food-science reference built by a trained cheese scientist, lays them out: first the milkfat softens and turns liquid, low on the scale at around 90°F, and then, higher up, the calcium bonds that hold the casein web rigid loosen so the protein can flow. Once both have happened, the slice slumps into a smooth, glossy, molten sheet. That is melting, and it is why the cheese pools flat on the pan instead of just getting greasy or staying stiff.
The crisp lace at the edge is a second reaction. Where the cheese meets the dry, hot pan, the water cooks off and the surface climbs past 284°F, the point where the milk proteins and the little bit of milk sugar in the cheese undergo the Maillard browning reaction, the same reaction that browns a seared steak or toast. That is what turns the rim golden, crisp and deeply savory. Michigan State University Extension explains the same melting behavior and why a cheese's age and moisture decide whether it flows or seizes. The nonstick surface is what lets the finished sheet, crisp edges and all, release in one piece instead of welding itself to the metal.
Use a Cheese That Actually Melts
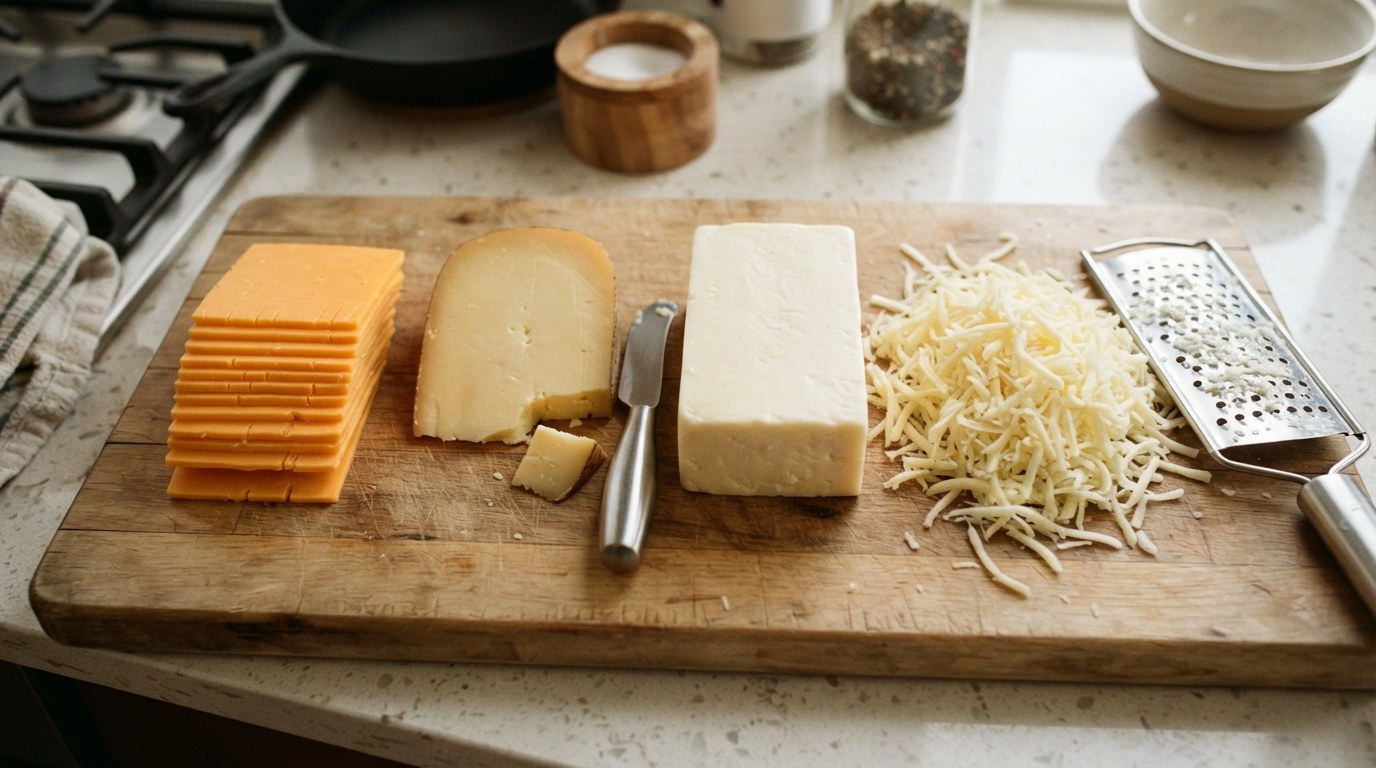
The cheese has to be one that can flow, and that comes down to age and moisture. Young, higher-moisture cheeses, medium cheddar, American, gouda, Monterey Jack, Havarti, melt into a smooth sheet because their casein web is still soft and full of water. Aged, dry, hard cheeses like parmesan or a very sharp aged cheddar have lost their moisture and cross-linked their proteins so tightly that they never really flow; they scorch and go grainy instead. The International Dairy Foods Association groups cheeses by exactly this kind of moisture and aging difference, which is the same thing that decides how they behave on the pan.
The other rule is to use slices or cheese you grate yourself, not a bag of pre-shredded cheese. Pre-shredded cheese is dusted with powdered cellulose or starch to keep the shreds from clumping in the bag, and that coating soaks up moisture and gets in the way of a clean melt, so it goes clumpy and grainy instead of smooth. A block you slice or grate at home has none of that. It melts into the sheet you want.
| Cheese | Melts on the pan? | Why |
|---|---|---|
| American, mild/medium cheddar | Yes, best | High moisture, soft casein; flows smooth and crisps at the edge |
| Gouda, Monterey Jack, Havarti | Yes | Young and moist; melt into a glossy sheet |
| Gruyère, Fontina, Swiss | Yes, richer | Good melters; nuttier, a little more oil |
| Freshly grated block cheese | Yes | No anti-caking coating to block the melt |
| Pre-shredded bagged cheese | Poorly | Cellulose/starch coating soaks up moisture; clumps and goes grainy |
| Parmesan, aged/dry hard cheese | No (crisps only) | Low moisture, cross-linked protein; scorches rather than flows |
The Two Things That Ruin It: Too Much Heat and the Wrong Pan
Too much heat breaks the cheese. If the pan is ripping hot, the emulsion splits: the milkfat separates out and pools as grease while the protein tightens into a rubbery, scorched clump, because the casein web cannot hold onto the fat once it is overheated. The fix is medium heat and a little patience, so the cheese has time to melt and its edge to brown gently rather than burn. If you see a slick of orange oil running off the cheese, the pan is too hot; pull it off the heat for a moment.
The wrong pan is the other half. A bare stainless or cast-iron pan will grab the melted, browning cheese and the crisp frico will weld to the metal and tear when you try to lift it, which is exactly the sticky, burned-on mess people end up scraping off. A good nonstick pan lets the whole sheet release clean. This is the one place the tool genuinely matters, and it is why the technique is built around a nonstick pan in the first place; the site's guide to Gordon Ramsay's cookware covers the nonstick pans that do this job. Keep the heat at medium, keep the pan slick, and the cheese behaves.
How to Do It
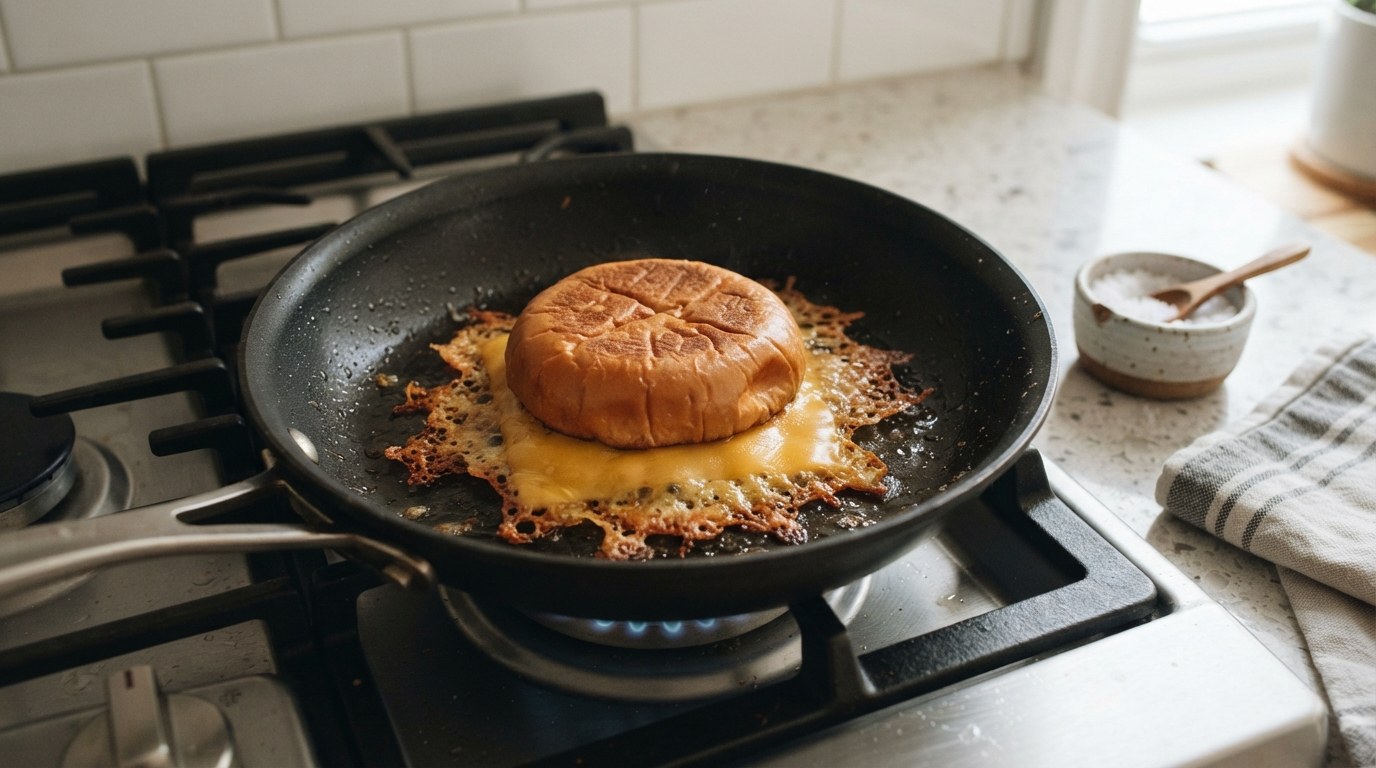
Cook your burger patty first and set it aside. Wipe the nonstick pan if it is very greasy, keep it on medium heat, and lay a single slice of cheese, or a small even pile of freshly grated cheese, flat in the middle of the pan. Leave it alone for roughly 45 seconds to a minute: it will melt into a bubbling puddle and the edge touching the pan will turn golden and lacy. Season the top with a small pinch of flaky salt. Then press the toasted bottom bun, cut side down, straight onto the melted cheese and hold it there for a second so the sheet grips the bread; lift, and the whole molten, crisp-edged layer comes up with the bun. Set the patty on top and build the burger.
You can press the hot patty onto the cheese instead of the bun if you would rather the cheese sit against the meat, which is the classic build; either way, melt it on the pan, not on the patty. If you are melting the cheese directly onto a patty that is still cooking, remember the burger itself still needs to reach 160°F in the center, the safe temperature the USDA sets for ground beef. The cheese trick is about the cheese; the doneness of the meat is unchanged.
| Step | Heat | About how long | What to watch for |
|---|---|---|---|
| Cheese onto the dry pan | Medium | Right away | A single slice or an even pile of grated cheese, flat |
| Melt and crisp the edge | Medium | 45 to 60 seconds | Bubbling in the middle, the rim golden and lacy |
| Season | Medium | A few seconds | A pinch of flaky salt on top |
| Press the bun (or patty) on | Off the heat | 2 to 3 seconds | The sheet grips; lift it up in one piece |
Which Burgers to Put It On
This trick belongs on any cheeseburger, and the site has plenty to try it on. Use it on the Gordon Ramsay Hell's Kitchen burger or the ultimate cheeseburger for a classic beef build, on the Gordon Ramsay burger recipe as a straightforward weeknight version, or even on the lamb burger, where a sharp melted cheddar with crisp edges stands up to the richer meat. The rest of the site's cooking techniques guides work the same way, one small move that changes the whole result.
Melting Cheese on a Burger FAQs
The questions that come up most: which cheese to use, why pre-shredded cheese will not melt smoothly, whether you can melt it right on the patty, what pan you need, why the cheese went greasy, whether American cheese works, and whether you need water and a lid.
What is the best cheese to melt on a burger?
A young, higher-moisture cheese that flows: American, mild or medium cheddar, gouda, Monterey Jack or Havarti all melt into a smooth sheet and crisp nicely at the edge. Gruyère, Fontina and Swiss work too and are a little nuttier. Avoid aged, dry cheeses like parmesan, which scorch instead of melting, and slice or grate a block yourself rather than using pre-shredded.
Why won't my pre-shredded cheese melt smoothly?
Bagged pre-shredded cheese is coated with powdered cellulose or starch to keep the shreds from sticking together, and that coating absorbs moisture and interferes with melting, so it turns clumpy and grainy instead of flowing. Buy a block and slice or grate it yourself; it has no coating and melts into the smooth, lacy sheet you want.
Can I just melt the cheese on the patty instead?
You can, but it is harder to get a full melt, and you miss the crisp edge. Melting on the pan puts the cheese directly on the heat so it melts all the way through and browns at the rim, and you lift it onto the burger. If you do melt it on the patty, the burger still has to reach 160°F in the center for food safety.
What kind of pan do I need?
A good nonstick pan. As the cheese melts and its edge browns, it wants to weld itself to the metal; a bare stainless or cast-iron pan grabs it and the crisp lace tears when you lift it. A nonstick surface lets the whole sheet release clean in one piece, which is the entire reason the technique is built around a nonstick pan.
Why did my cheese go greasy and split?
The pan was too hot. Overheated, the cheese emulsion breaks: the fat separates out as an oily pool and the protein tightens into a rubbery clump. Keep the heat at medium so the cheese melts gently and the edge browns without burning. If you see orange oil running off, pull the pan off the heat for a moment and let it settle.
Does American cheese work for this?
Yes, American cheese is one of the best for it. It is made to melt smoothly, so it flows into an even, glossy sheet and crisps cleanly at the edge without splitting. Real sliced cheddar and gouda melt just as well and bring more flavor; American simply gives the most foolproof melt.
Do I need water and a lid like other cheese-melting tricks?
No, and skipping them is the point. The water-and-lid method steams the cheese to melt it, but it also softens the bun and dilutes the sear. Melting the cheese on the dry pan gives you a full melt and a crisp browned edge with no added water, and you lift it onto a toasted bun that stays crisp.

About the Author
John Siracusa is the founder of Hell’s Kitchen Recipes. He focuses on technique-first, reproducible home cooking and researches recipes & kitchen equipment from published food science and professional chef methods since 2016.