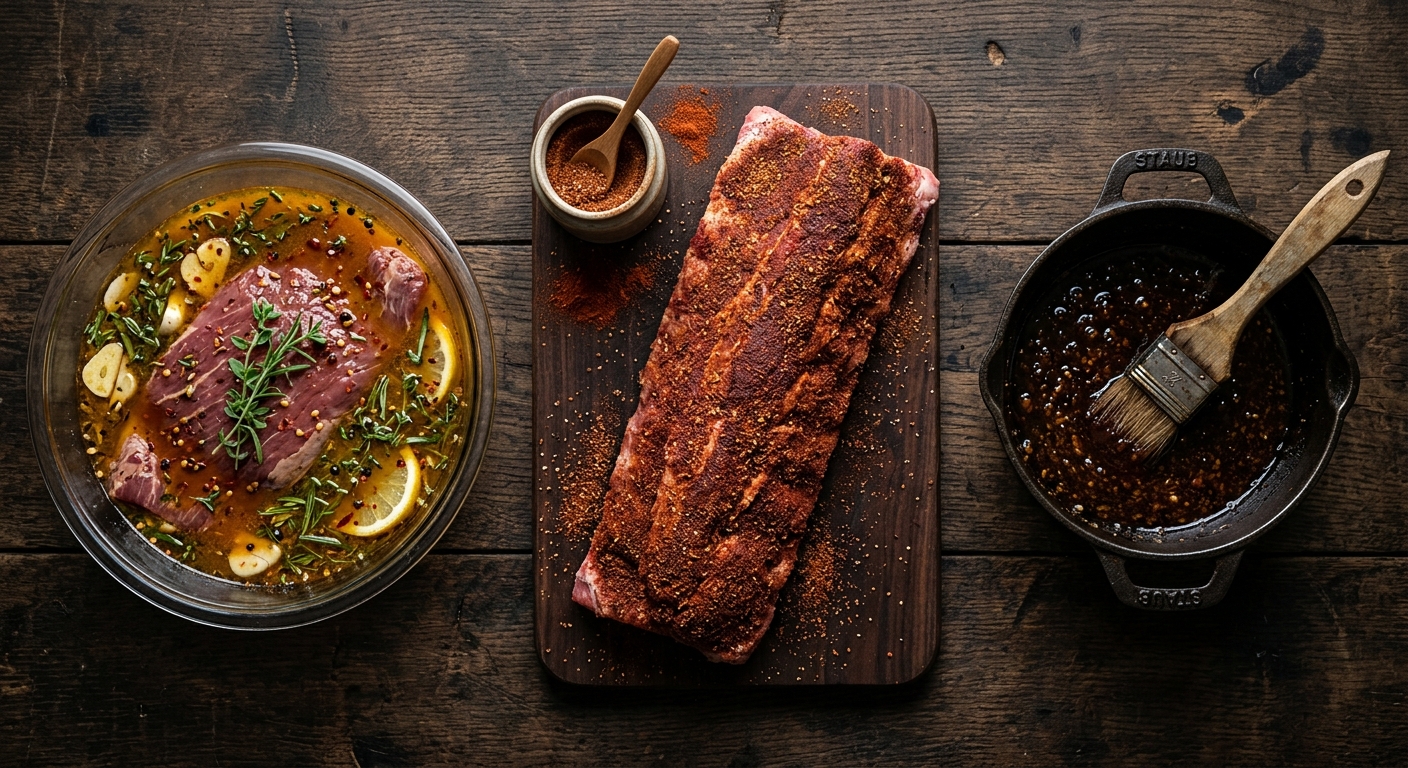
Choosing between a marinade, a rub, or a glaze is the first decision you make before anything hits the grill. Each method does something different to the meat. Marinades use acid and salt to change the protein structure. Rubs build a seasoned crust on the surface. Glazes add a sticky, caramelized finish in the last few minutes of cooking. They are not interchangeable. Using a rub when you need a marinade — or glazing too early — produces a different result than what you intended.
Most backyard grilling advice treats these three methods as a matter of personal preference. That is partly true, but the food science underneath tells a more specific story. The cut of meat, the cooking time, and the heat level all determine which method works best. A thin skirt steak benefits from a quick acid marinade. A thick pork shoulder needs a dry rub and hours of low smoke. A rack of ribs gets its lacquered finish from a glaze brushed on in the last 10 minutes. This guide breaks down the science behind each method and gives you a clear framework for choosing the right one.
What a Marinade Does to Meat
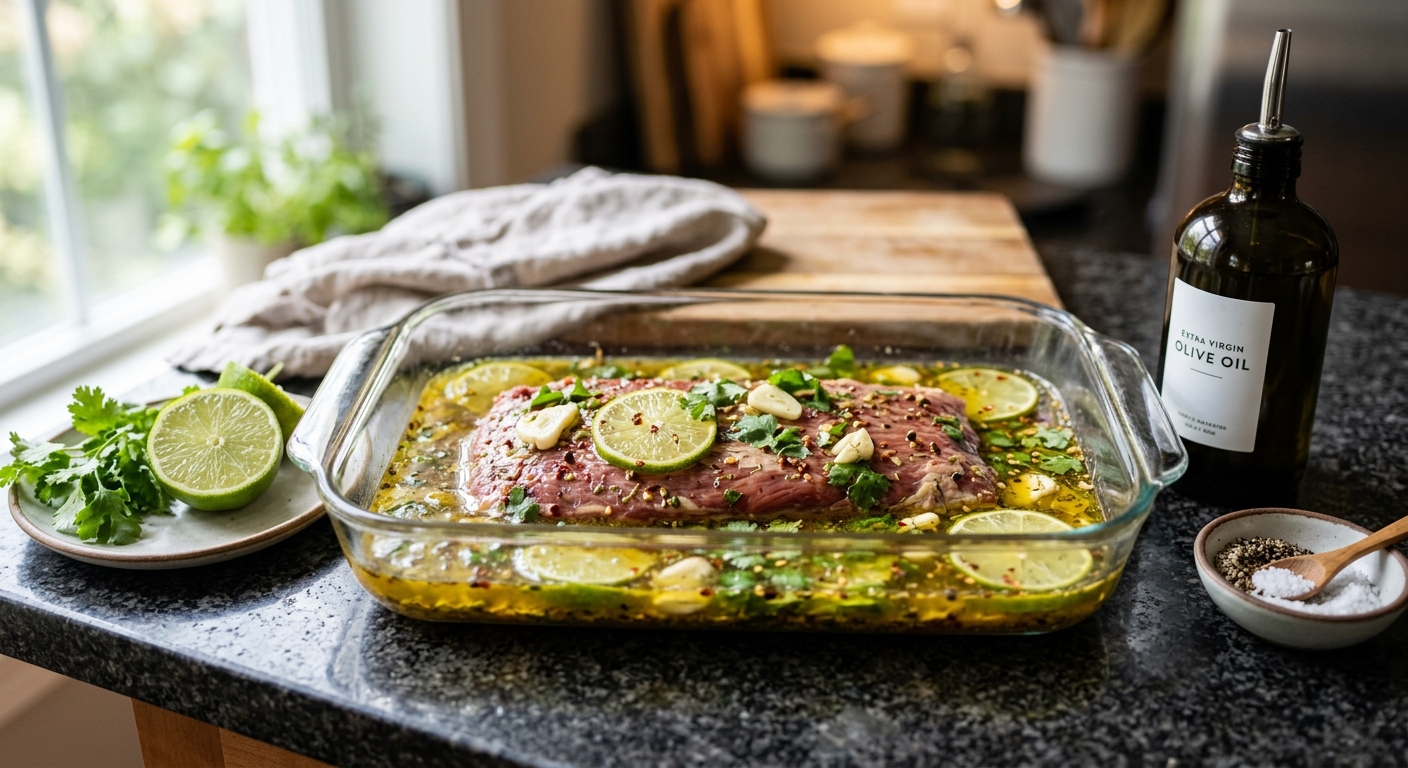
A marinade is a liquid mixture that contains three working ingredients: an acid, a salt, and a fat or oil. Each does a different job on the meat’s protein structure.
The acid — typically citrus juice, vinegar, wine, or yogurt — denatures surface proteins. According to Kenji López-Alt’s research at Serious Eats, acid unwinds the tightly coiled protein chains on the meat’s outer layer, which loosens the muscle fibers and allows the marinade liquid to penetrate slightly. The keyword is “slightly.” Marinades do not penetrate deeply. Studies cited by Harold McGee in On Food and Cooking show that most acid-based marinades reach only 1 to 2 millimeters into the meat surface, even after 24 hours.
The salt in a marinade works differently. Salt dissolves the myosin protein filaments, which allows the muscle fibers to absorb and hold more water. This process — similar to brining — makes the meat juicier after cooking. Salt penetrates deeper and faster than acid. A salt-heavy marinade can improve moisture retention throughout a thin cut like flank steak in as little as 30 minutes.
The oil or fat in a marinade serves two purposes: it carries fat-soluble flavor compounds (garlic, herbs, spices) to the meat surface, and it helps prevent sticking on the grill grate.
When a Marinade Works Best
Marinades are the right choice for thin, lean cuts that cook fast over high heat. Flank steak, skirt steak, chicken breasts, pork tenderloin, and shrimp all respond well to a 30-minute to 2-hour soak. The acid tenderizes the surface fibers, and the salt improves moisture retention — both critical for lean cuts that tend to dry out on the grill.
Marinades are the wrong choice for thick, fatty cuts that cook low and slow. A beef brisket or pork shoulder does not need acid tenderizing — the long cook breaks down collagen naturally. And the marinade liquid creates steam on the surface, which prevents bark formation. For those cuts, use a rub.
Marinade Time Limits
Over-marinating is a real problem. Acid denatures proteins in both directions. A short soak loosens fibers and improves tenderness. A long soak — past four to six hours for most acid-based marinades — breaks down the surface proteins so completely that the meat turns mushy and mealy. The USDA Food Safety and Inspection Service recommends marinating in the refrigerator and limiting soak times based on the cut and the acid concentration.
Yogurt-based marinades are an exception. Yogurt contains lactic acid, which is milder than citric or acetic acid. Indian and Middle Eastern cooks use yogurt marinades for 8 to 24 hours without texture damage. The lactic acid tenderizes more gently, and the yogurt proteins form a coating on the meat that chars beautifully on high heat — the same principle behind tandoori chicken and grilled kebabs.
What a Dry Rub Does to Meat
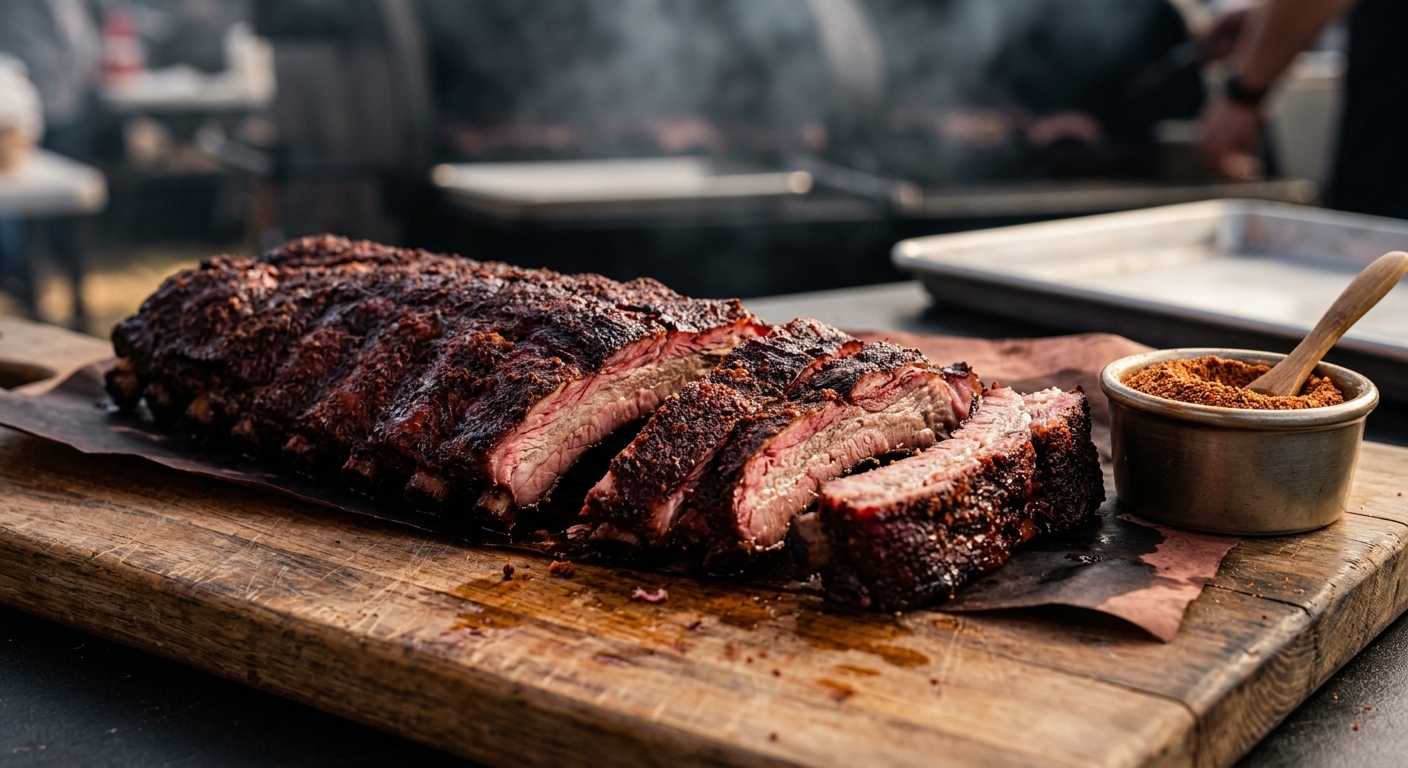
A dry rub is a mixture of ground spices, salt, sugar, and sometimes dried herbs applied directly to the meat surface. No liquid. The rub sits on the exterior and forms a crust — called bark in barbecue — when exposed to heat.
The science behind bark formation involves two reactions. First, the salt in the rub draws moisture from the meat surface through osmosis. That moisture dissolves the salt and spices, creating a thin seasoning paste on the exterior. As the meat cooks, that moisture evaporates, concentrating the flavors. Second, the sugars in the rub undergo caramelization above 320°F, and the proteins on the meat surface undergo the Maillard reaction above 280°F. These two browning processes — sugar caramelization and protein browning — combine with the dehydrated spice layer to create the dark, flavorful, slightly crunchy exterior that defines great barbecue.
Meathead Goldwyn, founder of AmazingRibs.com, describes bark as “the best part of barbecue” and attributes it entirely to the interaction between the dry rub, the meat surface, and the controlled low heat of a smoker or indirect grill zone. A wet marinade would prevent this interaction by keeping the surface too moist to brown.
When a Dry Rub Works Best
Rubs excel on thick cuts cooked low and slow: pork shoulder, beef brisket, whole chickens, racks of ribs, and tri-tip. These cuts have enough fat and connective tissue to stay moist during long cooks without needing the moisture-retention help that a salt marinade provides. The rub’s job is surface flavor and bark, not tenderizing.
Rubs also work on fast-cooking cuts when you want a seared crust. A heavily rubbed ribeye steak grilled over direct high heat develops a spice crust in three to four minutes per side. The rub acts as an extra layer of Maillard-reactive material on the steak surface.
Salt in Rubs: The Timing Question
When you apply the rub, matters. If you salt the meat and apply the rub 45 minutes to an hour before cooking, the salt draws moisture out, it dissolves into the surface liquid, and then the meat reabsorbs the salty liquid through osmosis. The result is seasoned meat all the way through the outer layer — not just on the surface. Serious Eats tested this method and found that salting 45 minutes ahead produced noticeably better flavor penetration than salting immediately before cooking.
If you apply the rub less than 10 minutes before cooking, the salt has only drawn moisture out,t but the meat has not reabsorbed it. The surface is wet, which means it steams instead of browning. The fix: salt at least 45 minutes ahead, or right before it hits the grate — never in between.
What a Glaze Does to Meat
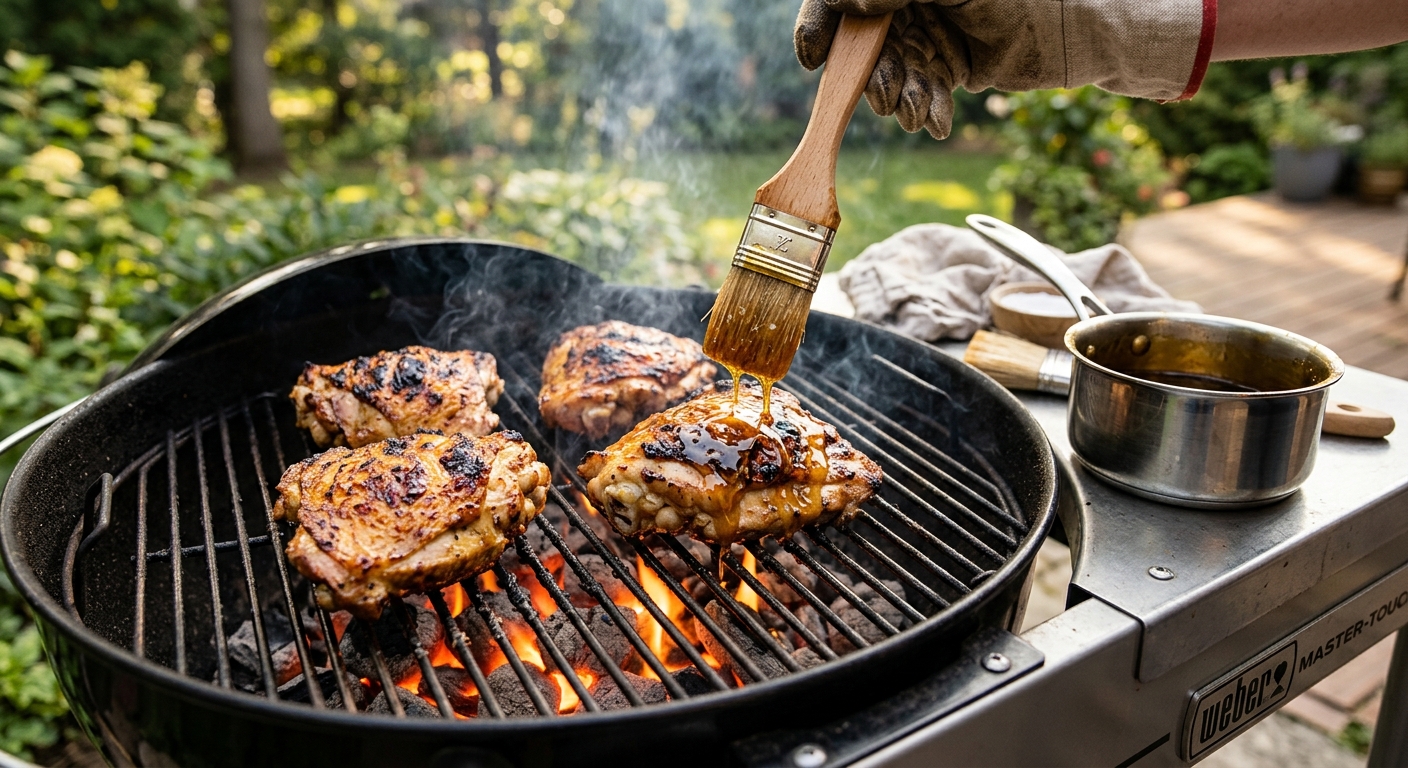
A glaze is a thin, sugar-based coating brushed onto meat during the last 5 to 15 minutes of cooking. Glazes contain a high proportion of sugar — honey, maple syrup, brown sugar, fruit preserves, or molasses — combined with an acid (vinegar, citrus) and seasonings.
The sugar is the functional ingredient. Above 320°F, sucrose molecules break down into glucose and fructose, which then undergo caramelization — a cascade of chemical reactions that produces the brown color, the sticky texture, and the complex sweet-bitter flavor compounds that define a glazed finish. According to food science research compiled by the Science of Cooking project, caramelization generates over 100 individual flavor compounds from a single sugar molecule.
This is why timing matters. Brush the glaze on too early, and the sugar burns before the meat is cooked. Sugar begins to burn and taste bitter above 350°F with prolonged exposure. A glaze applied in the last 10 minutes gets enough heat to caramelize and set,t but not enough to carbonize.
When a Glaze Works Best
Glazes finish what rubs and marinades start. A rack of ribs gets a dry rub, smokes for five hours, and gets a glaze brushed on in the final 15 minutes. Grilled chicken gets a marinade soak, goes on the grill, and gets a honey-mustard glaze in the last five minutes. The glaze is the top coat — the visual and textural finish.
Glazes work best on cuts that are already close to done. Ham, roasted pork loin, grilled salmon, grilled chicken thighs, and ribs all take glazes well because they have enough surface fat to bind with the sugar coating.
Marinade vs Rub vs Glaze: Side-by-Side Comparison
The choice between a marinade, rub, and glaze depends on the cut, the cook time, and the result you want. This table maps each method to its best use case.
| Factor | Marinade | Dry Rub | Glaze |
|---|---|---|---|
| What it does | Tenderizes surface, adds moisture, infuses flavor | Builds seasoned bark/crust on exterior | Adds caramelized sugar coating, shine |
| Key ingredient | Acid (citrus, vinegar, wine, yogurt) | Salt + ground spices | Sugar (honey, maple, molasses) |
| When applied | 30 min to 4 hours before cooking | 45 min to 12 hours before cooking | Last 5–15 minutes of cooking |
| Best cuts | Thin, lean: flank, skirt, chicken breast, shrimp | Thick, fatty: brisket, pork shoulder, ribs, whole chicken | Already-cooking: ribs, ham, salmon, chicken thighs |
| Heat level | High direct heat (sear fast) | Low and slow (indirect) or high sear | Medium — enough to caramelize sugar |
| Penetration depth | 1–2 mm (acid), deeper (salt) | Surface only (bark formation) | Surface only (coating) |
| Risk of overuse | Mushy texture (over-marinating) | Over-salting | Burnt sugar (applied too early) |
| Can combine? | Yes — marinate, then rub and grill. | Yes — rub, cook, then glaze to finish | Yes — glaze goes on last, over rub or marinade |
Combining Methods: The Three-Layer Approach
The best grilled meats often use two or all three methods in sequence. Each method occupies a different stage of the cooking process, so they do not conflict.
Layer 1: Marinade (pre-cook). Soak the meat in an acid-salt-oil mixture for 1 to 4 hours. This step handles tenderizing and moisture retention. Pat the meat completely dry before the next step.
Layer 2: Rub (pre-cook, after marinating). Apply a dry rub to the patted-dry surface. The rub adheres to the slightly tacky meat surface and builds the bark during cooking. The salt in the rub should be reduced if the marinade was already salty.
Layer 3: Glaze (during cook). In the last 5 to 15 minutes, brush on a sugar-based glaze. The glaze caramelizes on top of the bark, adding sweetness, shine, and a sticky texture.
This is the method behind competition-level barbecue ribs. The ribs get a mustard-vinegar marinade overnight, a paprika-brown sugar rub the next morning, five hours in the smoker, and a final coat of sweet glaze before they come off. Each layer builds on the one before it. The marinade seasons the interior. The rub builds the bark. The glaze adds the finish.
Marinade and Rub Recipes for Common Cuts
Here are tested formulas for each method, matched to the cuts they work best on. All measurements are for approximately two pounds of meat.
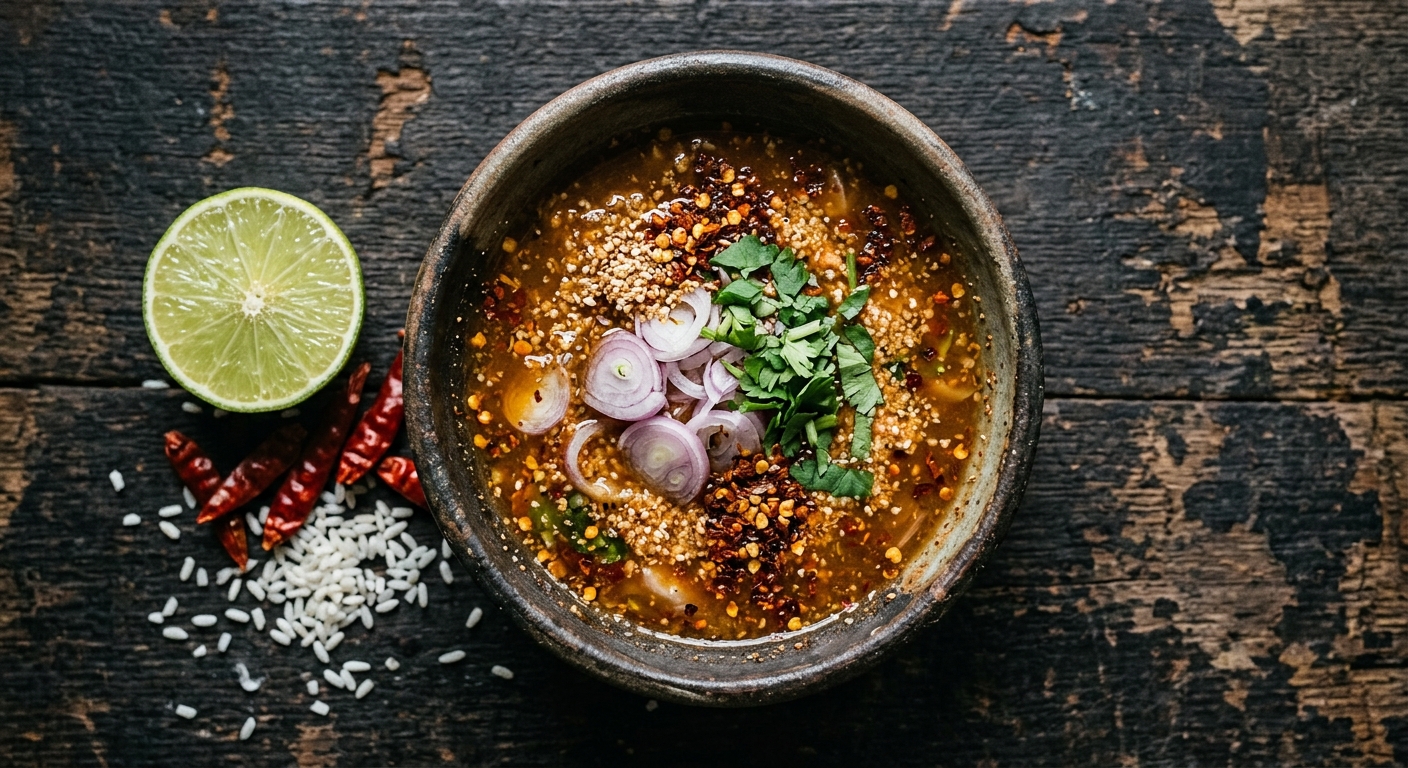
All-Purpose Citrus Marinade (for Chicken, Shrimp, Flank Steak)
Combine a quarter cup of fresh lime juice, two tablespoons of olive oil, two tablespoons of fish sauce, two minced garlic cloves, one teaspoon of sugar, and half a teaspoon of black pepper. Soak chicken for 1 to 2 hours, shrimp for 20 minutes and flank steak for 2 to 4 hours. Pat dry before grilling. The lime acid tenderizes lean proteins while the fish sauce builds umami depth — a technique borrowed from Thai crying tiger steak preparations.
Kansas City-Style Dry Rub (for Ribs, Brisket, Pork Shoulder)
Mix two tablespoons of paprika, one tablespoon each of brown sugar, garlic powder, onion powder, and black pepper, two teaspoons of salt, and one teaspoon each of cayenne and cumin. Apply generously and press into the meat. Let it sit for 45 minutes or overnight in the refrigerator. This rub builds heavy bark on long smokes. The brown sugar caramelizes during cooking.
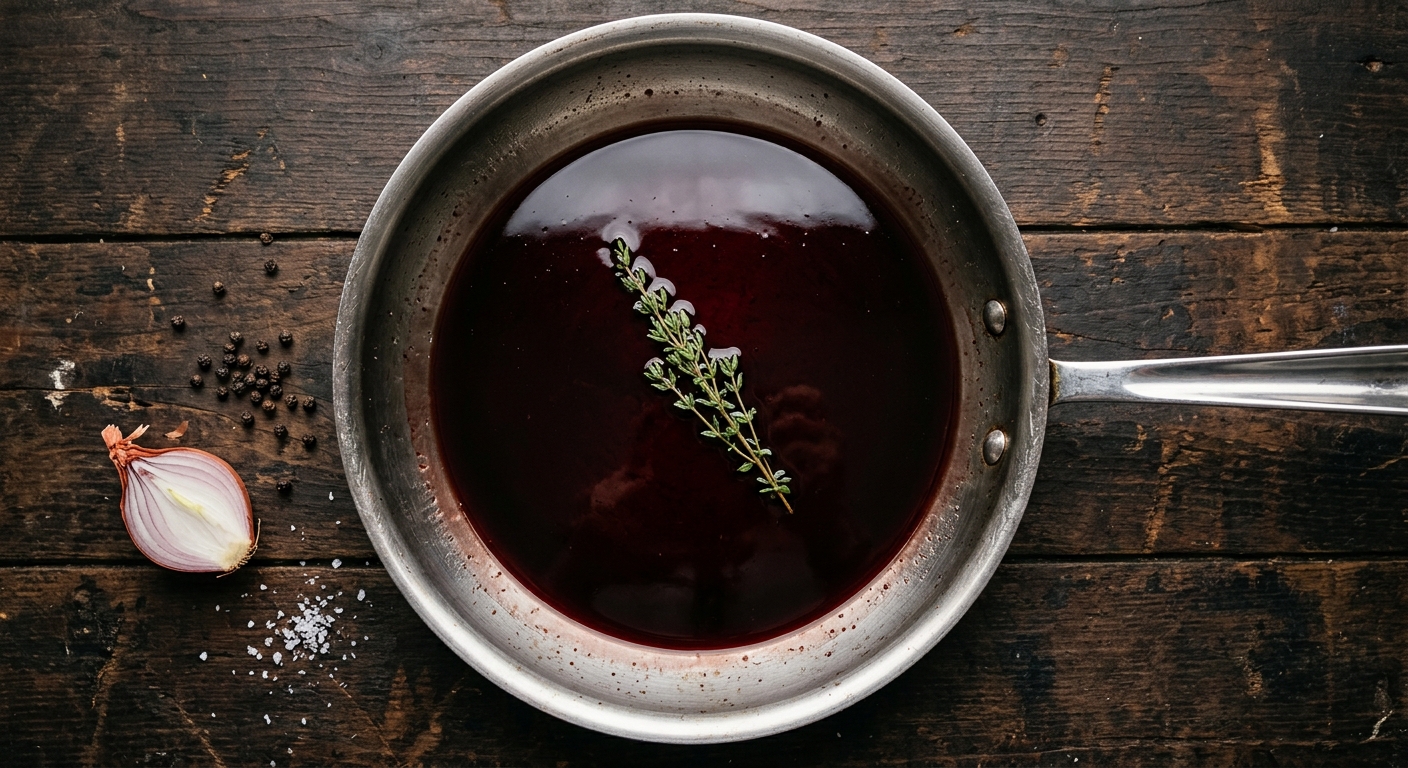
Honey-Bourbon Glaze (for Ribs, Chicken, Salmon)
Simmer a quarter cup of honey, two tablespoons of bourbon, one tablespoon each of soy sauce and apple cider vinegar, and one teaspoon of Dijon mustard over medium heat for five minutes until slightly thickened. Brush on meat during the last 10 minutes of cooking. The honey caramelizes fast, so watch the heat. Pull if the edges start to blacken.
Common Mistakes with Marinades, Rubs, and Glazes
Every method has a failure mode. Here are the ones that ruin grilled meat most often.
Marinating too long. Anything past four hours in a strong acid (citrus, vinegar) will start breaking down the surface proteins into mush. Chicken breast is especially vulnerable. If you need to prep ahead, use a yogurt-based or soy-based marinade, which is gentler.
Not drying the surface before grilling. Wet meat steams. Steaming prevents browning. Pat the meat dry with paper towels after marinating and before applying a rub. This single step is the difference between a seared crust and a gray, steamed exterior.
Putting sugar rubs on high heat. Sugar burns above 350°F with prolonged exposure. A rub with high sugar content works on low-and-slow cooks where the surface temperature stays moderate. On a 500°F grill grate, that sugar turns black and bitter in minutes. Save sweet rubs for indirect heat.
Glazing too early. The most common glaze mistake. Brush a honey glaze on at the start of a 30-minute cook, and it burns in the first 10 minutes. The sugar caramelizes fast. Glaze in the last 5 to 15 minutes only.
Using the same marinade as a sauce. Marinade that has contacted raw meat contains bacteria. The USDA says that used marinades must be boiled for at least one full minute before use as a table sauce. Better approach: Set aside a portion of the marinade before adding the raw meat and use that clean portion as a dipping sauce or glaze.
Why This Method Works
The marinade-rub-glaze framework is not a recipe preference. It maps directly to three distinct chemical processes in meat cookery.
Marinades work through protein denaturation and osmotic salt absorption — both documented in food science literature going back to Harold McGee’s On Food and Cooking (first published 1984, revised 2004). The acid disrupts hydrogen bonds in surface proteins; the salt disrupts ionic bonds in myosin. These are two different mechanisms targeting two different structures, which is why marinades need both acid and salt to work.
Rubs work through the Maillard reaction and sugar caramelization — two browning processes that require dry heat and low surface moisture. Serious Eats explains that the Maillard reaction begins at approximately 280°F when amino acids and reducing sugars recombine into hundreds of new flavor compounds. A dry rub provides extra amino acids (protein-based spices like garlic powder) and extra sugars (brown sugar, paprika) to amplify the reaction beyond what the meat surface alone can produce.
Glazes work through caramelization exclusively. Above 320°F, sugar molecules fragment and recombine into compounds with names like diacetyl (buttery), maltol (toasty), and furanones (caramel). This reaction happens fast and produces the sticky, glossy coating that defines glazed meat. The American Chemical Society notes that different sugars caramelize at different temperatures — fructose at 230°F, sucrose at 320°F, glucose at 300°F — which is why honey (high fructose) glazes brown faster than molasses (high sucrose) glazes.
Each process occupies a different stage of cooking. They do not compete. Understanding which process you need — tenderizing, bark-building, or caramelizing — tells you which method to reach for.
Frequently Asked Questions About Marinades, Rubs, and Glazes
Choosing between a marinade, rub, and glaze raises practical questions about timing, safety, and compatibility. Here are the most common ones.
Can I use a marinade and a rub on the same piece of meat?
Yes. Marinate first, pat the meat completely dry, then apply the rub. The marinade handles moisture and tenderizing; the rub handles bark and surface flavor. Reduce the salt in the rub if the marinade was salty. This two-step method is standard in competition barbecue.
How long should I marinate chicken?
Boneless chicken breasts: 30 minutes to 2 hours maximum in an acid-based marinade. Bone-in thighs: 2 to 4 hours. Whole chicken (spatchcocked): up to 4 hours. Yogurt-based marinades can go longer — up to 24 hours — because lactic acid is milder than citric acid.
Does a rub need sugar?
Sugar helps with bark formation and color by providing extra fuel for the caramelization reaction. But it is not required. Salt-and-pepper rubs (called dalmatian rubs in barbecue) work on high-heat grilling where you want a pure Maillard crust without sweetness. Use sugar rubs on low-and-slow cooks; skip sugar on high-heat sears.
When should I apply a glaze?
In the last 5 to 15 minutes of cooking. Sugar-based glazes burn quickly at high temperatures. Brush on a thin coat, let it set for 2 to 3 minutes, then brush on a second coat for a thicker finish. Multiple thin coats build better than one heavy coat.
Is a wet rub the same as a marinade?
A wet rub (or paste) sits between a marinade and a dry rub. It contains ground spices mixed with a small amount of liquid — oil, mustard, or citrus juice — to form a thick paste. Unlike a marinade, you do not soak the meat. You apply the paste directly, and it stays on the surface like a rub. Wet rubs work well when you want spice adhesion without a liquid bath.
This article is for informational and entertainment purposes only. It is not medical, nutritional, or food safety advice. Always follow USDA food safety guidelines and consult a qualified professional for dietary concerns.