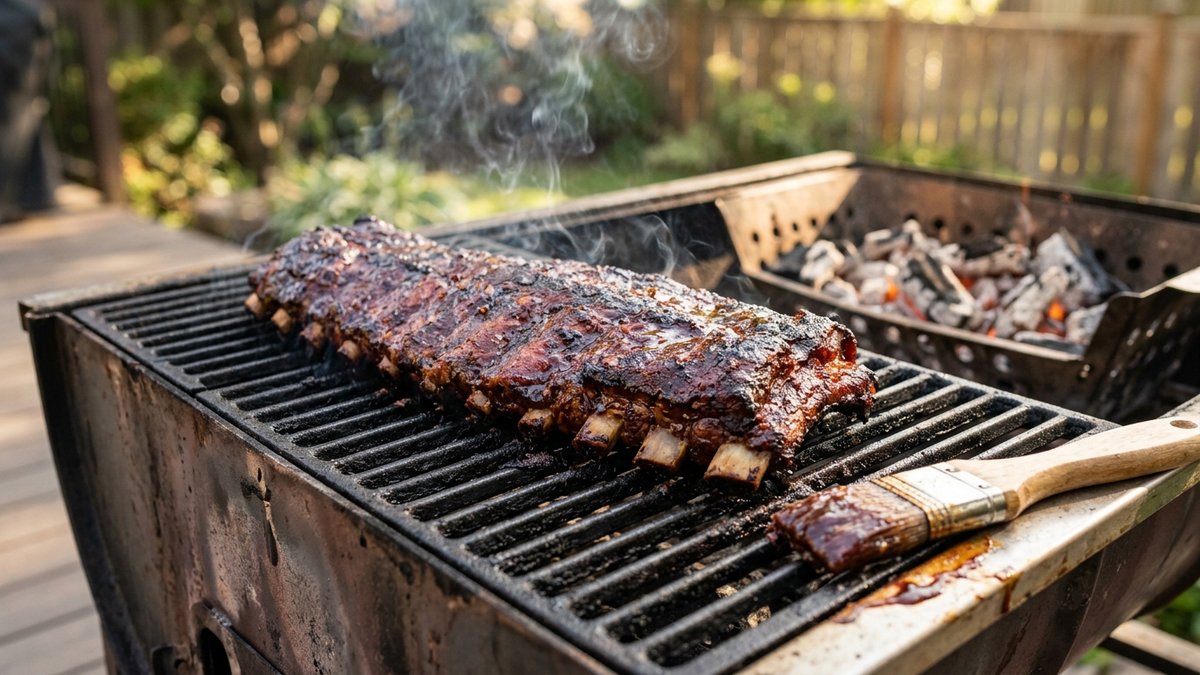
Grilling ribs is one of those cooking techniques that separates weekend grillers from people who actually know what they are doing. The difference is not talent. It is temperature control, timing, and a basic understanding of what happens inside the meat over three to five hours of low heat. Get those three things right and the ribs pull clean from the bone. Get any one of them wrong and you are chewing through tough, dried-out pork wondering what went sideways.
This guide covers the full method — from choosing the right cut to pulling the finished rack off the grate. Every temperature, time range, and technique recommendation below is sourced from published food science research and manufacturer guidelines, not guesswork.
Why Ribs Need Low and Slow Heat
Ribs are loaded with connective tissue — primarily collagen — that makes the meat tough when cooked fast. Collagen does not break down at normal searing temperatures the way a steak does. It needs sustained heat between 160°F and 180°F internal temperature, held over several hours, to convert into gelatin. That gelatin is what gives properly cooked ribs their slick, tender, pull-apart texture.
According to the Texas A&M Meat Science Section, collagen denaturation in pork begins around 150°F but accelerates between 160°F and 180°F when held at those temperatures over time. Rush the process with high heat and the collagen contracts instead of dissolving — leaving you with tough, chewy ribs no matter how good your rub is.
This is why every experienced pitmaster and grill manufacturer recommends indirect heat between 225°F and 300°F for ribs. You are not cooking them hot and fast. You are dissolving the collagen slowly while the fat renders and the smoke penetrates the surface.
Baby Back vs. Spare Ribs vs. St. Louis Cut
Three pork rib cuts dominate backyard grilling. Each one cooks differently because the meat-to-bone ratio, fat content, and connective tissue density vary between them. The National Pork Board’s cut guide breaks down the anatomical differences, but here is what matters for grilling.
| Cut | Location on Hog | Weight (per rack) | Cook Time at 275°F | Meat Texture | Best For |
|---|---|---|---|---|---|
| Baby Back Ribs | Upper rib cage, near spine | 1.5 – 2 lbs | 3 – 3.5 hours | Leaner, tender | Beginners, faster cooks |
| Spare Ribs | Lower rib cage, belly side | 3 – 4 lbs | 4.5 – 5.5 hours | Fattier, richer flavor | Maximum flavor, experienced grillers |
| St. Louis Cut | Spare ribs, trimmed square | 2.5 – 3 lbs | 4 – 5 hours | Even thickness, consistent cook | Competition-style presentation |
Baby backs cook faster because they are smaller and leaner. Spare ribs have more fat and connective tissue, which means more flavor but a longer cook. The St. Louis cut is a trimmed spare rib — the cartilage tips and flap are removed so the rack lies flat and cooks evenly. If you are grilling ribs for the first time, start with baby backs. They are more forgiving.
The Right Grill Temperature for Ribs
Aim for 275°F measured at the grate, not at the dome thermometer. Dome thermometers on most consumer grills read 25 to 50 degrees higher than actual grate temperature because heat rises and stratifies inside the cooking chamber. Weber’s grill setup guide recommends placing a probe thermometer at grate level for accurate readings.
The 275°F target balances two competing goals. Low enough to dissolve collagen slowly (you need hours, not minutes). High enough to render fat and develop bark — that dark, spiced crust on the exterior that carries most of the flavor. Below 225°F, the cook takes six-plus hours and the bark may never set. Above 325°F, the exterior dries out and the collagen does not have time to convert before the meat is overcooked.
For gas grills, light one side and cook on the other (indirect heat). For charcoal, bank coals to one side and place the ribs on the cool side. Both methods keep the ribs away from direct flame while maintaining steady temperature.
How to Set Up Indirect Heat
Charcoal Grill
Fill a chimney starter halfway with briquettes. When they are fully lit and ashed over, pour them onto one side of the charcoal grate. Place a disposable aluminum pan on the empty side, underneath the cooking grate, and fill it halfway with water. The water pan stabilizes temperature and adds moisture to the cooking environment. Place the ribs bone-side down on the cooking grate above the water pan — not above the coals.
Open the bottom vent halfway and adjust the top vent to hold 275°F. More air means higher temperature. Less air means lower. Check every 30 minutes and add 8 to 10 unlit briquettes per hour to maintain heat.
Gas Grill
Light the burners on one side of the grill. Turn them to medium-low. Leave the opposite burners off. Place the ribs bone-side down on the unlit side. Close the lid. Adjust the lit burners until the grate thermometer reads 275°F. Gas grills are easier to hold at a steady temp but produce less smoke flavor than charcoal.
For smoke on a gas grill, wrap a handful of soaked wood chips (hickory or apple) in aluminum foil, poke holes in the top, and place the packet directly on the lit burner under the grate.
The 3-2-1 Method for Spare Ribs
The 3-2-1 method is the most reliable framework for grilling spare ribs. It breaks the cook into three phases — each with a specific purpose. For baby backs, adjust to 2-2-1 because they are smaller and cook faster.
Phase 1: Smoke (3 Hours)
Season the ribs with a dry rub. Place them bone-side down on the indirect heat zone. Close the lid. Do not open it for at least 90 minutes. During this phase the smoke penetrates the meat and the bark begins to form. Add wood chunks (hickory, apple, cherry, or pecan) during this stage for smoke flavor.
Phase 2: Wrap (2 Hours)
Pull the ribs off the grate. Lay them meat-side down on a double layer of heavy-duty aluminum foil. Add two tablespoons of apple juice, apple cider vinegar, or beer. Wrap tightly and return to the grill, seam-side up. This phase steams the ribs in their own juices, accelerating the collagen breakdown. The foil traps moisture and pushes through the stall — that plateau around 160°F where evaporative cooling temporarily stops the internal temp from rising.
The stall frustrates a lot of first-timers. The meat temperature flatlines for an hour or more and it looks like nothing is happening. Wrapping in foil bypasses the stall by preventing evaporative cooling from the meat surface. This is the same principle behind the USDA’s updated guidance on pork cooking temperatures — sustained heat over time matters more than peak temperature alone.
Phase 3: Glaze (1 Hour)
Unwrap the ribs. Place them back on the grate bone-side down. Brush with your sauce of choice — thin layers, not a heavy coat. A thick layer of sauce burns and turns bitter. Thin layers caramelize. Apply two to three coats over the final hour, brushing every 20 minutes. If you make your own sauce, a vinegar-based or tomato-based homemade BBQ sauce works better than store-bought because you control the sugar content. High-sugar sauces burn faster at grill temperatures.
How to Tell When Ribs Are Done
Internal temperature is the most reliable indicator, but it is not the only one. The USDA’s safe minimum internal temperature for pork is 145°F, but ribs are not steaks. At 145°F the collagen has barely started to break down. You want 195°F to 205°F internal temperature — measured between the bones in the thickest section of meat.
Three tests that work together:
- Bend test. Pick up the rack from one end with tongs. If the meat cracks on the surface and the rack bends deeply without breaking in half, it is done.
- Toothpick test. Slide a toothpick or probe into the meat between two bones. If it slides in with the same resistance as room-temperature butter, the collagen has dissolved.
- Bone pull. Twist a bone gently. If it rotates freely in the meat, the ribs are done. If it resists, give them another 20 to 30 minutes.
Use all three. Temperature gives you the number. The physical tests confirm the texture matches.
A Basic Dry Rub That Works
A good rib rub balances salt, sugar, heat, and aromatics. This ratio works for any pork rib cut:
- 1/4 cup brown sugar (creates bark)
- 2 tablespoons paprika (color and mild sweetness)
- 1 tablespoon kosher salt
- 1 tablespoon black pepper
- 1 tablespoon garlic powder
- 1 tablespoon onion powder
- 1 teaspoon cayenne pepper (adjust to taste)
- 1 teaspoon cumin
Mix and apply generously to both sides of the rack. Let the rubbed ribs sit uncovered in the refrigerator for one to four hours before grilling. The salt draws surface moisture out, which dissolves the rub into a paste. That paste sets into bark during the smoke phase.
Common Mistakes That Ruin Grilled Ribs
Cooking over direct heat. Direct flame chars the exterior while the interior stays raw near the bone. Ribs need indirect heat — always. If you can hold your hand over the cooking zone for four to five seconds before pulling away, the heat is in the right range. If you pull away in under two seconds, the ribs are too close to the fire.
Not removing the membrane. The thin, papery membrane on the bone side of the rack does not render or break down during cooking. It turns into a tough, rubbery sheet that makes the ribs harder to eat and blocks smoke and seasoning from penetrating the underside. Slide a butter knife under the membrane at one end, grip it with a paper towel, and pull it off in one piece.
Opening the lid too often. Every time you open the lid, you lose 50 to 75 degrees of built-up heat. The grill takes 10 to 15 minutes to recover. During a five-hour cook, four unnecessary lid lifts can add an extra hour to your total cook time. Check the ribs at the scheduled intervals — end of phase 1, end of phase 2, every 20 minutes during phase 3.
Saucing too early. Sugar in BBQ sauce burns at grill temperatures. Apply sauce only during the last hour. Brushing sauce on during the first three hours creates a charred, bitter coating instead of a caramelized glaze.
Skipping the rest. Pull the ribs off the grill and let them sit for 10 to 15 minutes before cutting. The juices redistribute during the rest period. Cutting immediately lets the liquid run out onto the cutting board instead of staying in the meat. Tent loosely with foil — do not wrap tightly, which steams the bark soft.
Why This Method Works
The three-phase approach targets the two proteins that determine rib texture: collagen and myosin. During the first three hours of low indirect heat, collagen begins to denature and convert to gelatin — the process that Texas A&M’s meat science research identifies as the primary driver of tenderness in collagen-heavy cuts. The wrapping phase accelerates this conversion by trapping steam, which conducts heat more efficiently than dry air alone.
The final unwrapped phase serves a different purpose. It dries the bark and caramelizes the sauce through the Maillard reaction — the same browning chemistry that creates the crust on a properly seared cheesesteak or a pan-seared London broil. Removing the foil lets the surface moisture evaporate, which is necessary for bark formation. Without this final phase, the ribs taste great but look and feel steamed rather than grilled.
The resting period at the end follows the same principle as resting any large cut of meat. Muscle fibers that contract during cooking need time to relax and reabsorb liquid. Research published by the National Pork Board shows that carryover heat continues to cook pork 5 to 10 degrees after removal from the heat source — which is why pulling at 195°F to 200°F delivers a final temperature in the ideal 200°F to 205°F range.
Frequently Asked Questions
The questions below cover the most common sticking points for people grilling ribs at home for the first time. Each answer is sourced from USDA food safety data, manufacturer guides, and published meat science research.
What temperature should I grill ribs at?
275°F at the grate level is the sweet spot. This gives you enough heat to render fat and develop bark while keeping the temperature low enough for collagen to convert to gelatin over three to five hours. Do not rely on the dome thermometer — it reads high. Use a probe thermometer placed at grate level for accuracy.
How long does it take to grill a rack of ribs?
Baby back ribs take 4.5 to 5 hours total using the 2-2-1 method. Spare ribs and St. Louis cuts take 5.5 to 6 hours using the 3-2-1 method. Both assume a steady 275°F grill temperature. Higher temps shorten the cook; lower temps extend it. Wind, outside air temperature, and how often you open the lid all affect total time.
Should I boil ribs before grilling?
No. Boiling extracts flavor and fat into the water instead of keeping it in the meat. The collagen still breaks down during boiling, but the gelatin leaches out with the liquid. You end up with ribs that are tender but bland. Low and slow grilling does the same tenderizing work while preserving the fat, smoke flavor, and seasoning on the surface.
Do I need to remove the membrane from ribs?
Yes. The thin membrane (called the peritoneum) on the bone side of the rack does not break down during cooking. It blocks smoke and seasoning from reaching the underside and creates a tough, chewy texture. Use a butter knife to loosen one corner, then grip with a paper towel and pull it off in one sheet.
Can I grill ribs without wrapping them in foil?
You can. Unwrapped ribs develop a thicker, drier bark and a stronger smoke flavor. The trade-off is a longer cook time — add one to two hours to account for the stall — and a slightly chewier texture because less steam means slower collagen conversion. Competition pitmasters sometimes skip the wrap for bark quality, but for a backyard cook the wrap gives you a safer, more consistent result.
What internal temperature are ribs done?
195°F to 205°F, measured between the bones in the thickest section. The USDA minimum for pork safety is 145°F, but at that temperature the collagen has not broken down enough for tender ribs. You need 195°F or above for the gelatin conversion that gives ribs their fall-off-the-bone texture.
This article is for informational purposes only. Cooking temperatures and times vary by equipment, altitude, and weather conditions. Use an instant-read thermometer to confirm doneness.

About the Author
John Siracusa is the founder of Hell’s Kitchen Recipes. He focuses on technique-first, reproducible home cooking and researches recipes & kitchen equipment from published food science and professional chef methods since 2016.