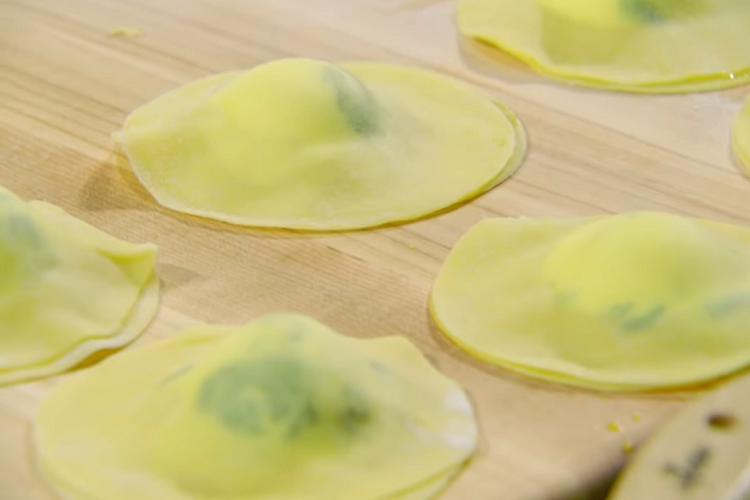
Making specialty homemade noodles and stuffing them by hand can sound like a difficult process, but making amazing specialty pasta cuts and stuffed Ravioli pasta from scratch is extremely simple. Also, using freshly homemade pasta is a complete game-changer in crafting delicious, five-star dishes.
How to Make Ravioli Gordon Ramsay
The majority of specialty pasta and stuffed pasta is made from fresh pasta sheets of lasagna. If you want to simplify making ravioli for yourself, buying fresh, large sheets of lasagna from the grocery store will remove the necessity of making the actual pasta from scratch yourself.
But it would be best if you made sure that the pasta sheets you buy are not pre-cooked. Pre-cook will not adhere and will not allow forming a pocket between the two pasta sheets when making ravioli.
Gordon Ramsay Pasta Dough Tips and Tricks
The actual dough-rolling process can be calming; however, it requires careful attention to keep the pasta dough from tearing, sticking to itself, or warping into a different shape. Remember to have plenty of patience and to watch carefully, and you’ll have smooth, perfect sheets of pasta.
Gordon Ramsay Ravioli Filling
If you’re making a stuffed pasta, make the filling while the dough is resting. There are endless ways to fill your noodles! You can choose cheese, greens, vegetables, or meat, but you will need around 2 1/4 cups of filling for one batch of ravioli. For one batch of tortellini, you will need just a bit less filling.
Traditional Ricotta Pasta Filling
- Ensure that you use whole-milk ricotta cheese and that it is the freshest you’re able to find. If it looks close to cottage cheese consistency, use a sieve lined in cheesecloths to drain it overnight, so it isn’t too wet to use.
- Whip 16 ounces (2 cups) of whole-milk ricotta together with 1.5 cups of thinly grated Parmesan, some black pepper, and a good dash of salt.
- An optional add-in is 3 tablespoons of parsley, basil, or chives that have been finely chopped. Cover the bowl and keep cold until ready to use.
Make Tortellini Shapes and Half-Moon Ravioli
Step 1. Roll the pasta dough out in the rolling machine until the sheet is semi-transparent. It will be incredibly thin and delicate. Use plenty of semolina flour to dust a baking sheet. Keeping the other pasta sheets covered with plastic wrap or a kitchen towel, select one pasta sheet to work with.
Step 2. On a countertop lightly dusted in flour, take a 2.5 inch round cookie cutter and cut the pasta sheet into rounds as you would with cookie dough. Toss aside any of the scraps of pasta dough. Cut the rest of the pasta sheets into rounds, keeping all rounds covered after being cut.
Step 3. In the center of each dough round, place one half-teaspoon of filling. Lightly brush the edges of one pasta round with some water, working with a single round at one time.
Step 4. Form a half-moon shape with the dough round by folding the pasta dough’s bottom edge over the drop of filling. Ensure the edges are aligned with each other, then press them down to seal the shape. Press out any of the air pockets between the edge and the filling. You’ll have half-moon ravioli that can either be left as is or made into tortellini pasta.
Step 5. Pull the corners of the filled half-moon together with the folded edge as the pasta facing you until they barely overlap and create tortellini! They should have a dimpled middle and an outer edge that looks cupped.
Step 6. Press and seal the edges that are overlapping and place the tortellini onto the prepared baking sheets. Keep cutting and filling pasta dough. By the end, you should have around sixty tortellini. Keep them uncovered, letting them sit for about half an hour to make them a little stiff.
Step 7. To store tortellini, they can be wrapped up in plastic and then refrigerated for four hours. Alternatively, they can be placed in the freezer until they’re firm, placed in a freezer bag, and frozen for up to a month. To cook frozen tortellini, do not thaw them first. Add frozen tortellini to a pot of boiling water and simmer them for three or four minutes.
Rolling Pasta Dough by Machine
- Using a roller machine can simplify making pasta by hand, but it can take some more time when you’re first learning how to use it properly. Make sure you leave plenty of time for yourself to complete the process, which includes resting the dough, rolling it out, and forming the pasta into your desired shape.
- Clear your countertops to give yourself a large space to work on. If this is your first time making pasta by hand, try it over a weekend where you have plenty of time instead of a weeknight. Making homemade pasta demands that you use all five of your senses.
- It will soon be clear to you that no batch of dough is the same; variables that can cause a difference include varying levels of humidity or weather, the kind of flour you use, or the size of your eggs you mix into the dough.
- If your pasta dough seems to be sticking, use flour to dust the workspace and the dough. If the dough seems too dry, add egg yolk. Having good judgment is just as important for great pasta as the recipe is.
- Although it can be hypnotic, do not watch the pasta coming out of the roller machine. Instead, watch the pasta as it is coming into the machine. Use one hand to make sure that it goes in straight as it is supposed to, not rippling or overlapping.
Rolling Pasta Dough by Hand
- Anyone can become an expert on rolling pasta by hand, but it can pose some difficulty for first-time rollers. Think of rolling pasta by hand as a fine craft. When you develop a keen sense of working with fresh pasta dough, it will be much easier for you to understand how the dough will respond to a rolling pin, how long it will stay moist, and how much flour you will need to make sure that the dough doesn’t stick to the surface.
- Before you start rolling the pasta, line three oven-baking sheets with some parchment paper, then use some semolina flour to dust the pans and set them aside lightly.
- Cut a quarter of the dough off, then rewrap the rest of the dough so it will not dry out. Take the smaller section of dough and put it onto a working surface that has been dusted lightly with additional flour. Starting in the middle of the dough, flatten the dough into a disk using the heel of your hand.
- With a long rolling pin, roll the dough disk out starting from the middle, but do not go all the way to the edge of the circle. Keep rolling outwards from the middle, rotating the dough after each rolling motion a quarter-turn. This maintains the dough’s circle shape. If the dough’s disk begins to stick, dust it lightly with some flour and make sure you’re working briskly so the dough does not have a chance to dry out.
- When the pasta sheet is rounded and smooth, place the rolling pin down horizontally across the circle’s top from the 11 o’clock space to the 1 o’clock space. Take the shorter end of the circle, wrap it around the rolling pin, and then roll it towards yourself in a single turn that will create a tube shape around the rolling pin. You will be working with only a quarter of the pasta sheet at one time.
- While you’re rocking the rolling pin forward and backward, pull the two edges of the pasta dough that are on the pin in opposite directions. Stretch the sheet out until it’s about the same length as the rolling pin is. Keep working as quickly as possible, so the dough does not begin to dry out. If you need to, repeat this process until your whole sheet is translucent and smoothly stretched.
- Cut your pasta into a few sheets, depending on how much you have. Dust these sheets with a light layer of semolina flour so they won’t stick. Stack these dusted sheets of pasta on the baking sheets, then cover them with lightly damp kitchen towels. Repeat this with all the remaining pasta dough.
- When you have a good grasp of the basic pasta recipe, you can try making small changes, like using a different kind of flour or adding flavors that will stand out when paired with different sauced. Try making whole grain pasta noodles with a rich, meaty sauce! Add some herbs to noodles and top with some butter and Parmesan cheese, or make saffron fettuccine noodles to pair with shrimp and fresh basil!
Cutting Pasta into Noodle Shapes
Plain pasta dough is a blank canvas for endless possibilities! You could make normal, hearty noodles, cut them into sheets, make homemade lasagna noodles, cannelloni pasta, cute bowtie (farfalle), or use the dough to shape ravioli or tortellini noodles.
Even if you really master one of these, it’s awe-inspiring. But, if you know how to do all of these, you earn the title of an advanced chef in the home.
Noodles Cut by a Machine
- To cut pasta noodles using a pasta roller, take the pasta sheets and run them through the roller’s cutting attachment one at a time. Toss the noodles with some semolina flour after they have been cut. Gently toss the noodles, then separate them into little piles of about three ounces, representing one portion of pasta.
- Line some baking sheets with parchment paper, then dust some semolina flour on top. Place the piles of pasta onto the sheets and cover until you’re ready to use them again.
Noodles Cut by Hand
- To cut noodles by hand, stack four pasta sheets that have been lightly dusted with some semolina flour. Next, loosely roll them into thirds as if you’re folding a letter for an envelope. Use a sharp knife to cut the dough. For fettuccine or tagliatelle, cut in half-inch increments.
- For pappardelle, cut in three-quarter inch increments. Continue this process until all the dough is cut. Fluff the noodles gently, then separate them into piles of three-ounce servings. Place the piles onto the prepared baking sheets and cover until use.
Noodles That are “Hand-Torn”
- Take a single rolled sheet of pasta. Pinch the dough with your thumb and first finger at about one-half-inch beside the corner, then tear down the pasta sheet lengthwise. Repeat the process, trying to keep your width consistent for all noodles.
- Toss the noodles with some semolina flour, then gently fluff them and pile them into three-ounce servings. Place the piles onto some prepared baking sheets and cover them until you’re ready to use them.
Homemade Sheets of Lasagna
- Cut pasta dough sheets into pieces that are six by ten inches for traditional lasagna. Another method is for making fazzoletti, which are little handkerchiefs made of pasta, usually served with fresh basil pesto. To make the fazzoletti, cut the sheets of dough into pieces that are four by four inches.


